The Best Visual Supports for a Special Education Classroom
Visual supports are a great way to build independence within your special education classroom. Students thrive off of visuals and visual aids. Visual supports help with classroom management and help support your daily routine. Visual supports can be used in a variety of situations and over time you can build your collection of visual supports.

Why Use Visual Supports
One of my favorite quotes I came across as a new teacher was one said by Temple Grandin. She said “I’m a visual thinker, not a language-based thinker. My brain is like google images.” I often think back to this quote as a teacher and really do my best to use visual supports within the classroom when they can be beneficial.
The use of visuals are a great way to build independence, increase student success and provide individualized support where needed. The use of visuals in a special education classroom is evidence-based practices for students with special needs. There are many different ways you can utilize visuals in your classroom, and we are going to discuss them today!
Visual supports to use in your special education classrooms:
- Technology visuals (GRAB THESE FOR FREE!)
- Work center visuals
- Lining up spots
- Visual rules (GRAB IT FOR FREE!)
- Schedules
- Emotions visuals
- Individualized Visuals
- Calm down corner
- Calm down kit
- Transitions/timers
- Breathing Visuals (GRAB THESE FOR FREE!)
- Break Visuals
- Social Stories
- Working Cards
- First/Then Boards
- Voice Volume Levels
- Table Tools
Technology visuals
Technology is a huge component to any classroom. The use of technology can increase student engagement and increase student participation. However, it can also pose as a big distraction. Some students are highly motivated by technology and can be troublesome when the technology is not being used. In my classroom I had some simple visuals that could be attached to our computers and iPads. It simply said “computer is closed” and was laminated and attached with a tiny piece of velcro. These served as visual reminders to students that it was not time to use the computer.
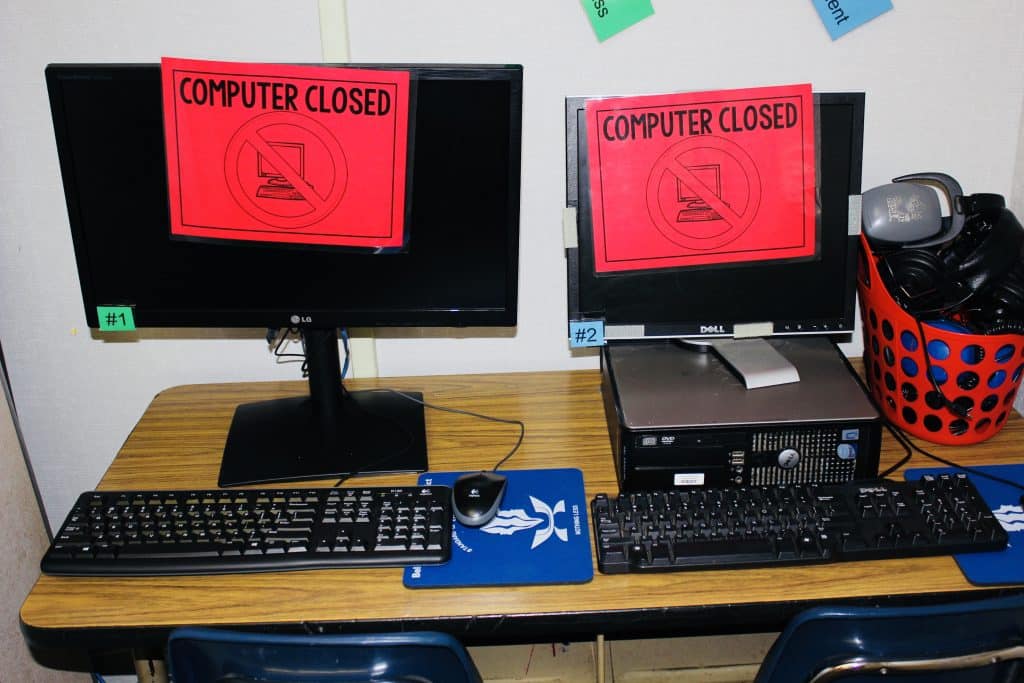
One of the challenges of implementing technology is teaching students to transition away from the preferred activity. This can send some students into panic. By implanting a simple visual you can create a non-verbal prompt to transition away from the technology. You can also pair a visual similar to the one below with a visual timer to ease the transition away from the preferred technology.

If you have a technology center in your classroom, consider adding visuals for designated spaces for iPads, chrome books or any other technology you may have access to.

If you are trying to build independence within the classroom, you can also create visuals to help students log into the computers and iPads. In my classroom I had visuals for all of the computers usernames and passwords. This helped students to be able to log in and out themselves.
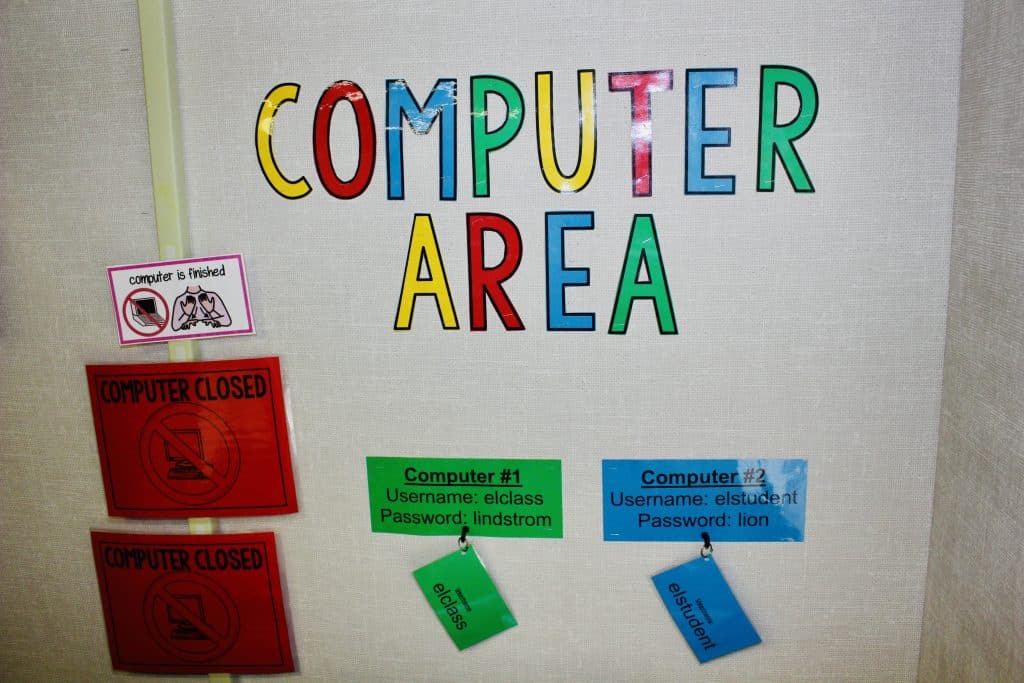
You can grab some of these visuals for free in my Free Resource Library HERE!
Lining up spots
How do your student’s line up? Where do they line up for recess? After recess? There are so many transitions within the school day and sometimes some lining up visual cues can ease the chaos of everyday (multiple times a day) transitions. I taught in a bungalow with a ramp, and to start the year I would chalk off visual cues for students to know where to stand when waiting to enter the classroom. This helped students from crowding one another.
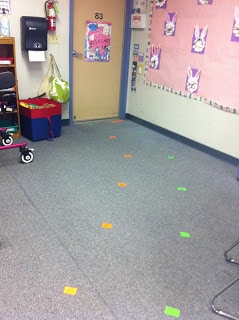
I also had visual spots on the floor inside my classroom for students to line up at when exiting the classroom. Like outside, it helped students to avoid crowding the peers in front of them. Simple visual aids for lining up drastically helped with classroom management in my classroom.
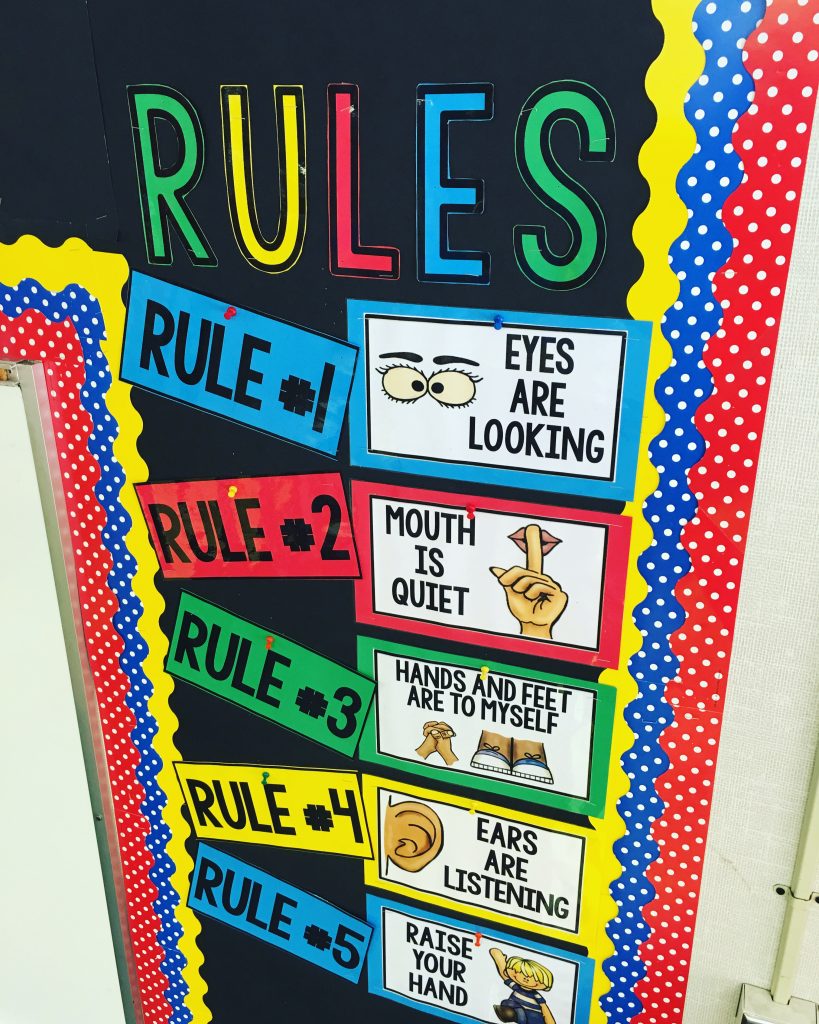
Visual rules
Classroom rules are a part of every classroom. They may be simple visuals or they may be more in depth depending on the needs of the students. Irregardless, rules should be posted. Here are my visual rules I had posted in my classroom. You can grab these visual rules for free in my free resource library HERE.
Schedules
Schedules are the backbone to any special education classroom. Visual daily schedules come in a variety of formats depending on the needs of your visual learners. There are whole class visual schedules as well as individual schedules. The type of schedule you chose for your student will be determined based on the needs of the students. To read more about the different kinds of visual schedules, click HERE.

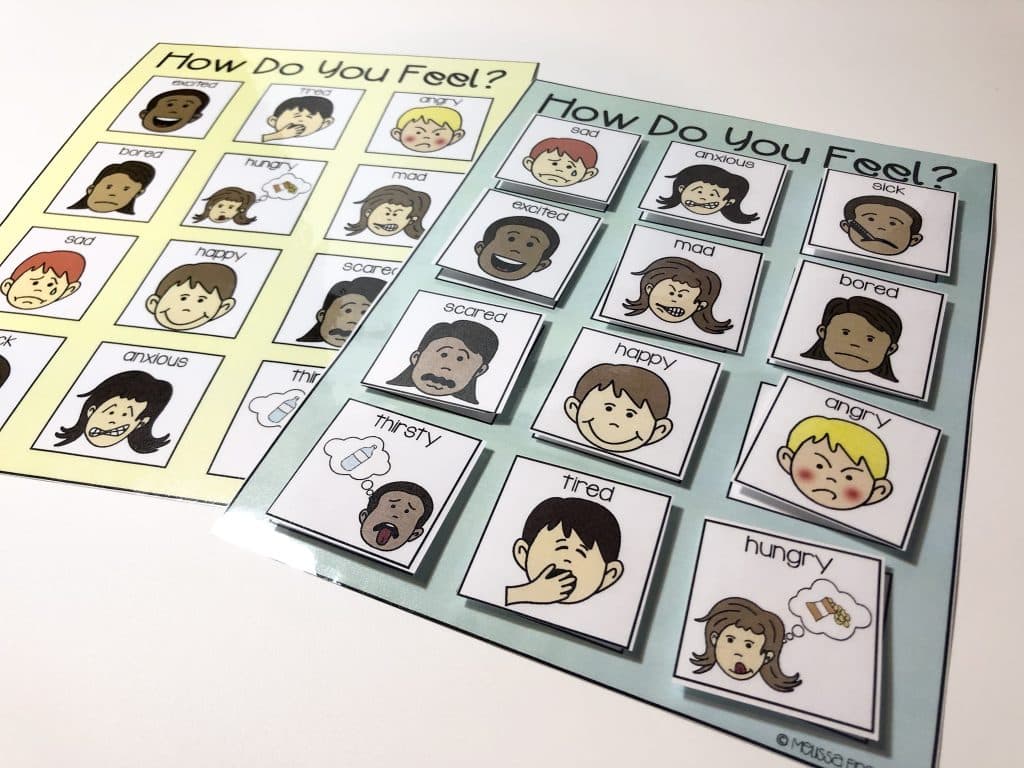
Emotions visuals
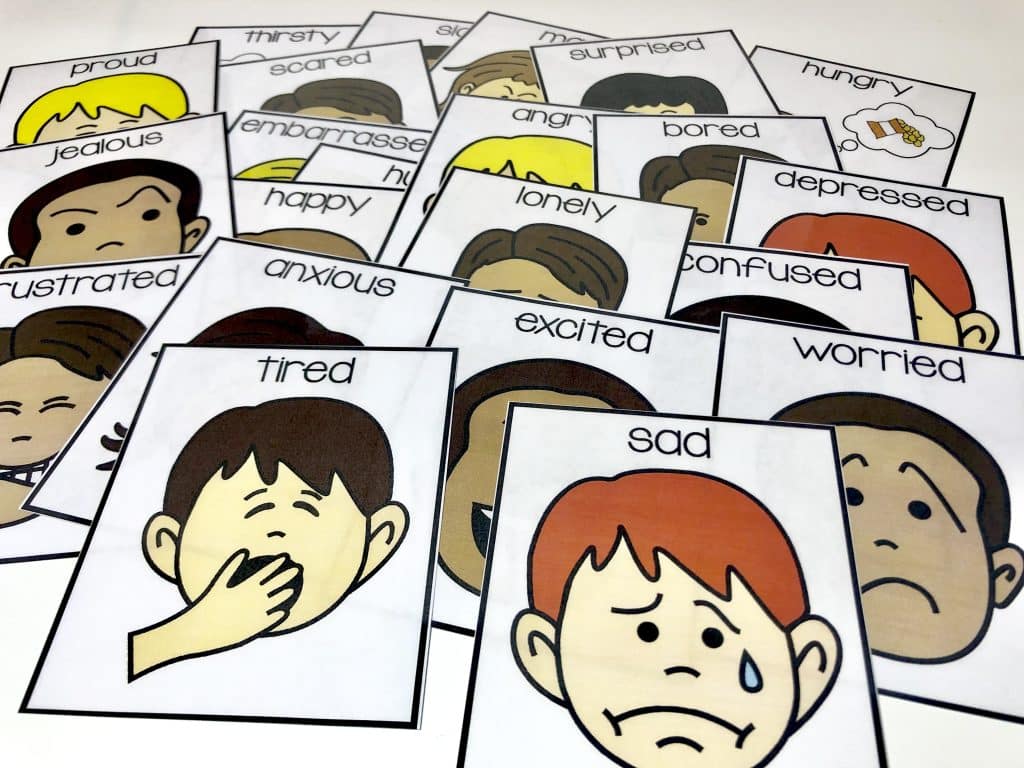
If regulating emotions is a big part of your day, emotion visuals are a must in your classroom. Having an emotions poster or visual is a great tool for students to help identify emotions and learn to cope with them. You may have these visuals “on the go” or printed large in your classroom. There is no right or wrong way to post emotion visuals, it is just important to have access to them. It is also important to teach students to utilize the visuals on their own to build indepdendence. Here are few examples of emotions visuals:

Individualized Visuals
Your classroom is mostly full of classroom visuals that your students have access to when needed. However, individual students will need individualized classroom visuals as well. Consider student needs and what visuals they may need to help them access that part of the day. You can quickly make visuals, graphic organizers or use picture symbols to add support to various activities in the day.
Here is an example of an individualized visual for a student who struggled with lunch inside the cafeteria. The sensory overload caused a lot of anxiety. With staff support we were able to successfully help this child through lunch inside the cafeteria with his peers with a simple visual. Each step paired with visual timers helped ease anxiety and help the student be successful within the cafeteria.

Here is another quick visual I made using picture symbols to help students with a community based field trip.

Calm down corner
If regulating emotions is a part of your daily routine, consider setting up a calm down corner. A calm down corner is a safe space for students to de-escalate and calm down. Once calm, they can return back to the task at hand. A calm down corner should have visuals to help with coping as long as tools needed to help students. To learn about a calm down corner in depth, read more HERE.
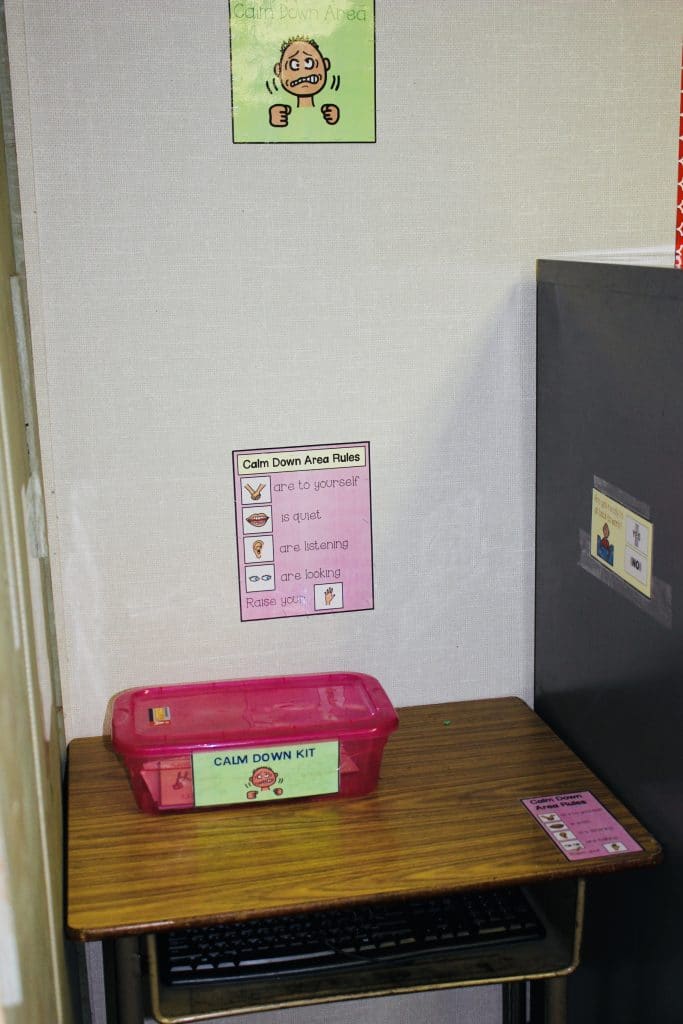
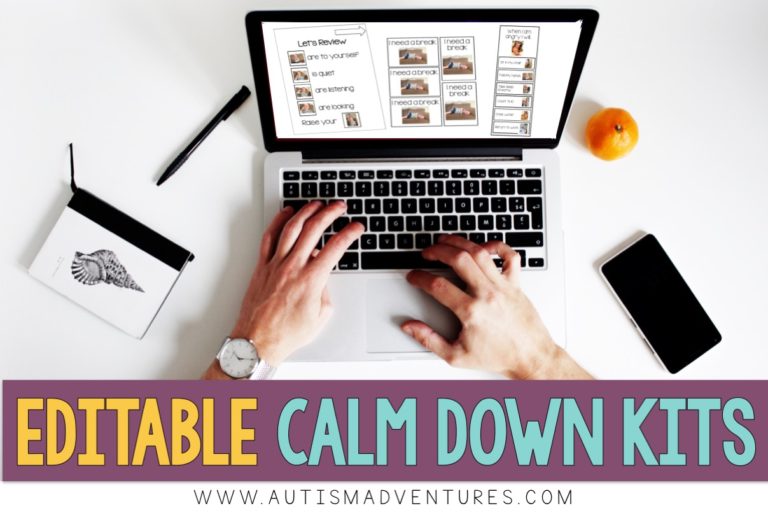
Calm down kit
Calm down kits are great tools to keep in your classroom for classroom management. A variety of materials can be stored in a calm down kit depending on the needs of your students. It is important to include visuals and tools to help de-escalate any challenging behaviors. I have a post ALL about calm down kits where you can read more in depth about them HERE.

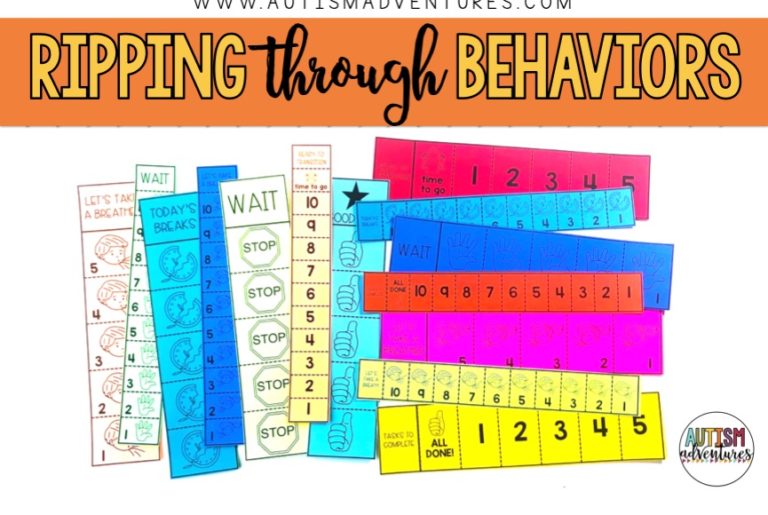
Transitions/timers
Transitions can sometimes cause chaos in the classroom. Creating visual cue cards that visually represents each interval of time during a out down can help students understand the transition. It can also reduce the verbal cues which can add to the overal chaos of big transitions. Using visual timers can also be a huge help for students to transition smoothly. One of my favorite use of visual supports is projecting a visual timer in front of the classroom. To see all my favorite timers osld on Amazon, click here. This is a great tool for whole class transitions, managing staff and reducing any confusion. It is also a great classroom management tool.
Breathing Visuals
It is important to teach students who are upset how to regulate their breathing. By implementing a visual aid shown below, you can teach students to count ad focus on their breathing. Deep breathing is proven to help regulate emotions. You can grab some of these deep breathing visuals for free HERE.


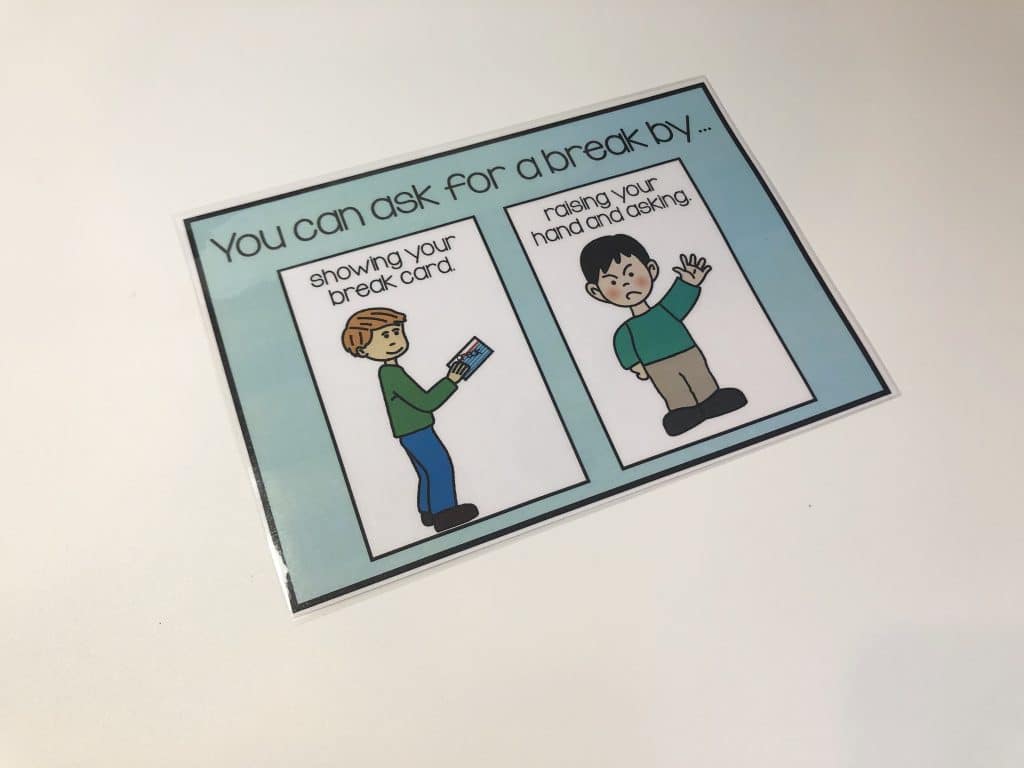
Break Card Visuals
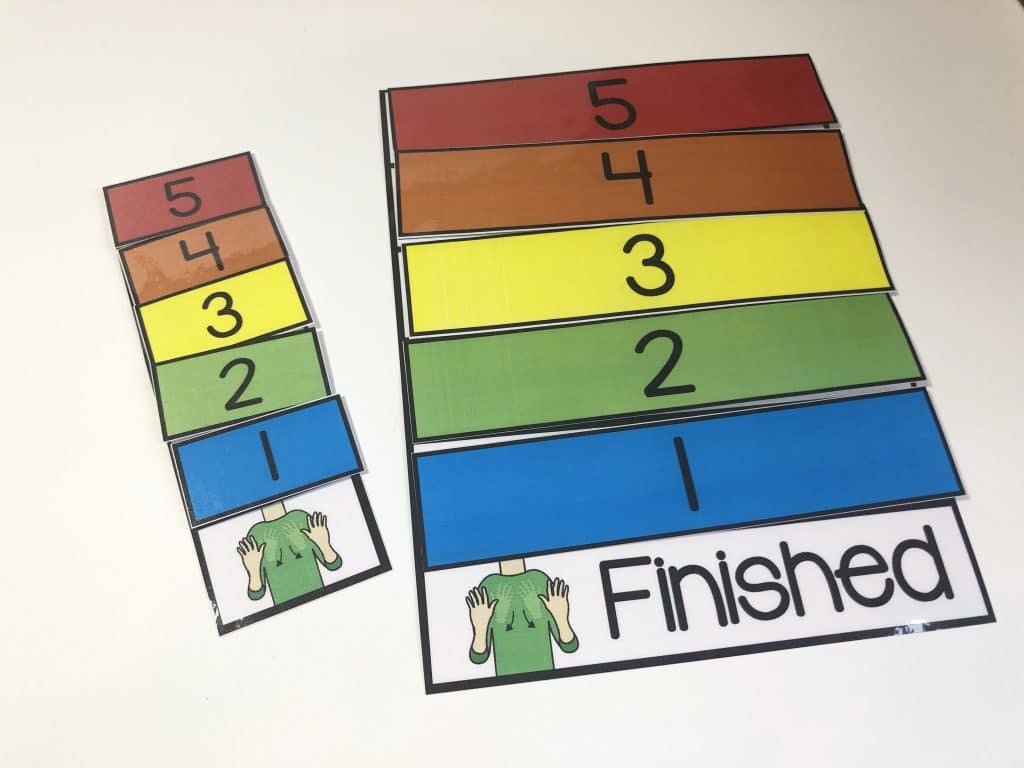
Teaching students to request a break when needed is an important skill and can avoid challenging behaviors. By teaching students to recognize frustration and requesting a break properly, you will be greatly reduce the tantrum behaviors in your classroom. Shown below are various break cards you can use in your classroom.
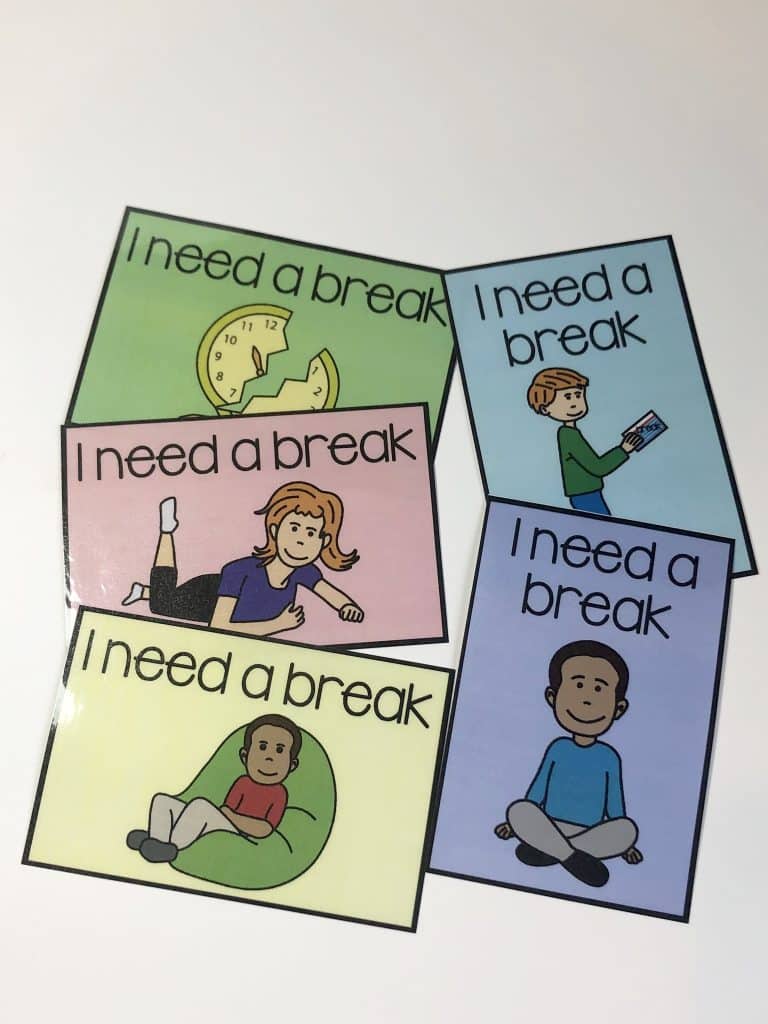
While teaching students to request a break is essential skill, you also want to limit how many breaks a student can take within any given time period. This will be determined differently for individual students and their individual needs. By creating a visual of how many breaks the student is allowed in a day, or an activity, the student will learn to prioritize when they can request a break. Below is an example of various break cards you can use in your classroom.

It is also important to have a visual for students to communicate how they are feeling after they take their break. This is a simple visual I created to ask students if they are ready to return to work. Simple visuals like this that reduce the verbal prompts within the classroom are helpful in reducing unnecessary noice within the classroom.

Sensory Visuals
The visual, “what will make you feel better?” is a great tool to use when students are showing signs of frustration. The visual choice boards help to facilitate communication when a child is struggling to communicate independently. You can use various picture symbols of tools you have access to in your classroom. Implementing sensory breaks in your daily routine is a great way to try to help students regulate their emotions.

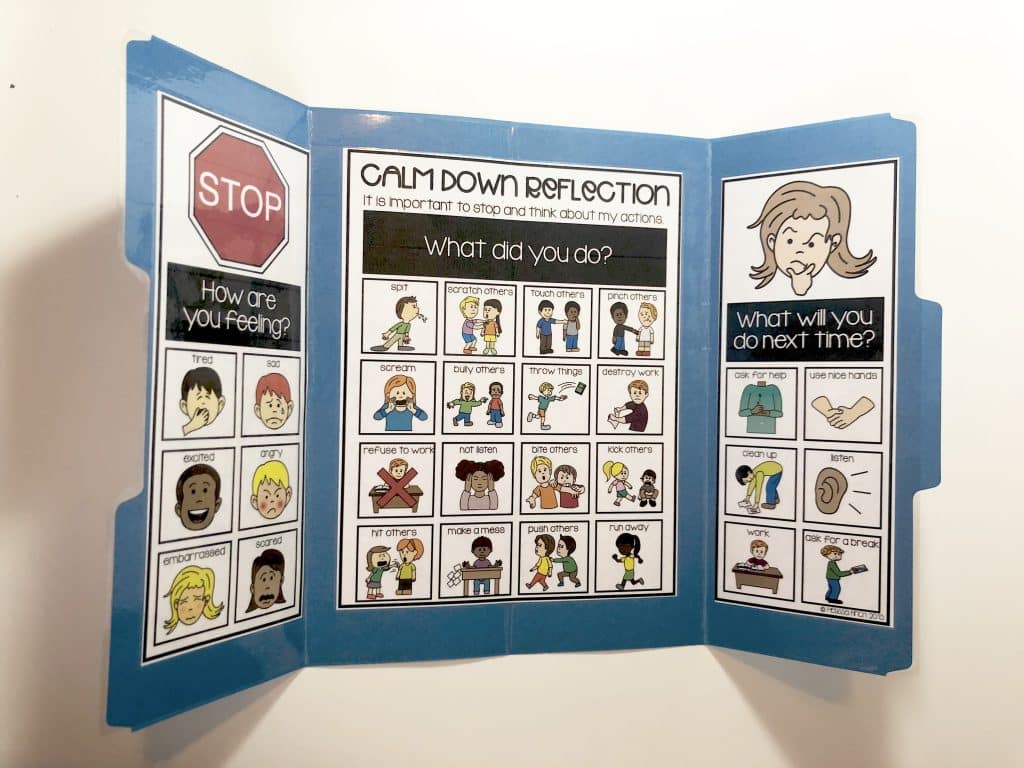
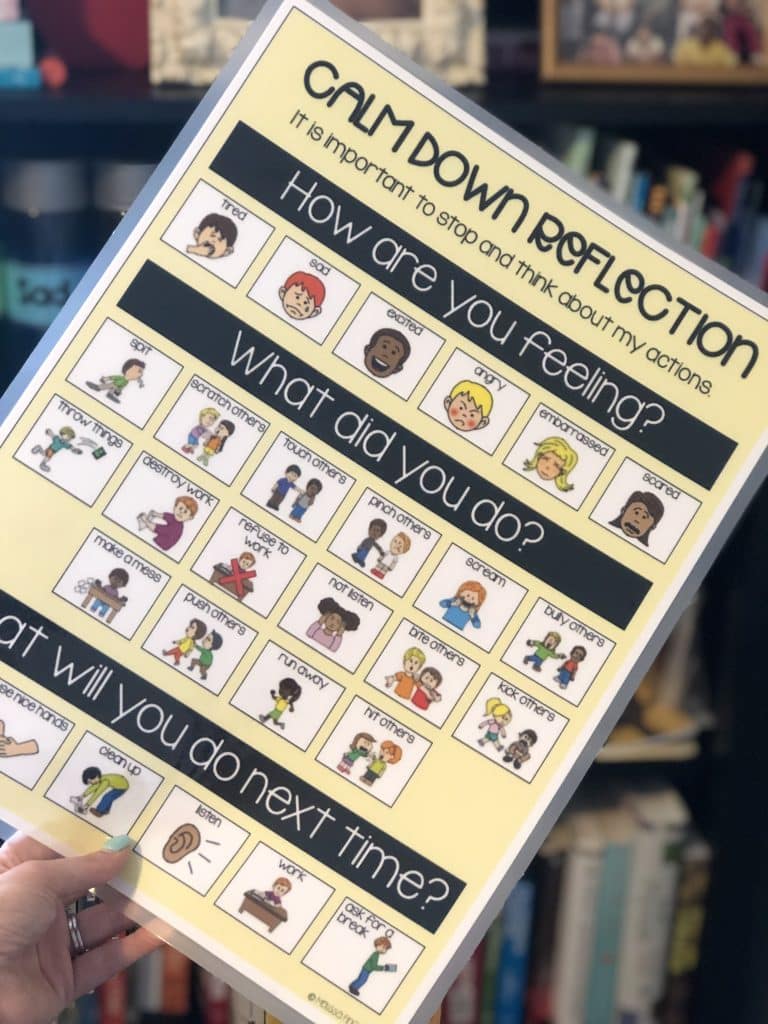
Reflection Visuals
When students have a tantrum or display a cahllening behavior, the first priority should be to help the child de-escalate. It is also important to teach them how to reflect on their actions. I like to use a simple visual, shown below, help students reflect on their actions. This should be done once the child is calm and ready to discuss their behavior. It is not something that should be done while the student is displaying their challenging behavior. This may be shortly after a break, or it may be later in the day depending on the needs of the student.
Social Stories
Social narratives or social stories are a great tool to use with special education students because they build social skills, communication skills and social emotional learning within the classroom. They provide direct instruction on specific skills. To learn the what, where, why and who of social stories, read more HERE.
I created 60 (differentiated levels) social stories aligned to my behavior basics curriculum. It is a great resource to build a large social story collection within your classroom. Simply store them in your social story library and quickly access when you need a refresher on any life skills, social situations or behavior needs. To learn more about behavior basics curriculum, click HERE.

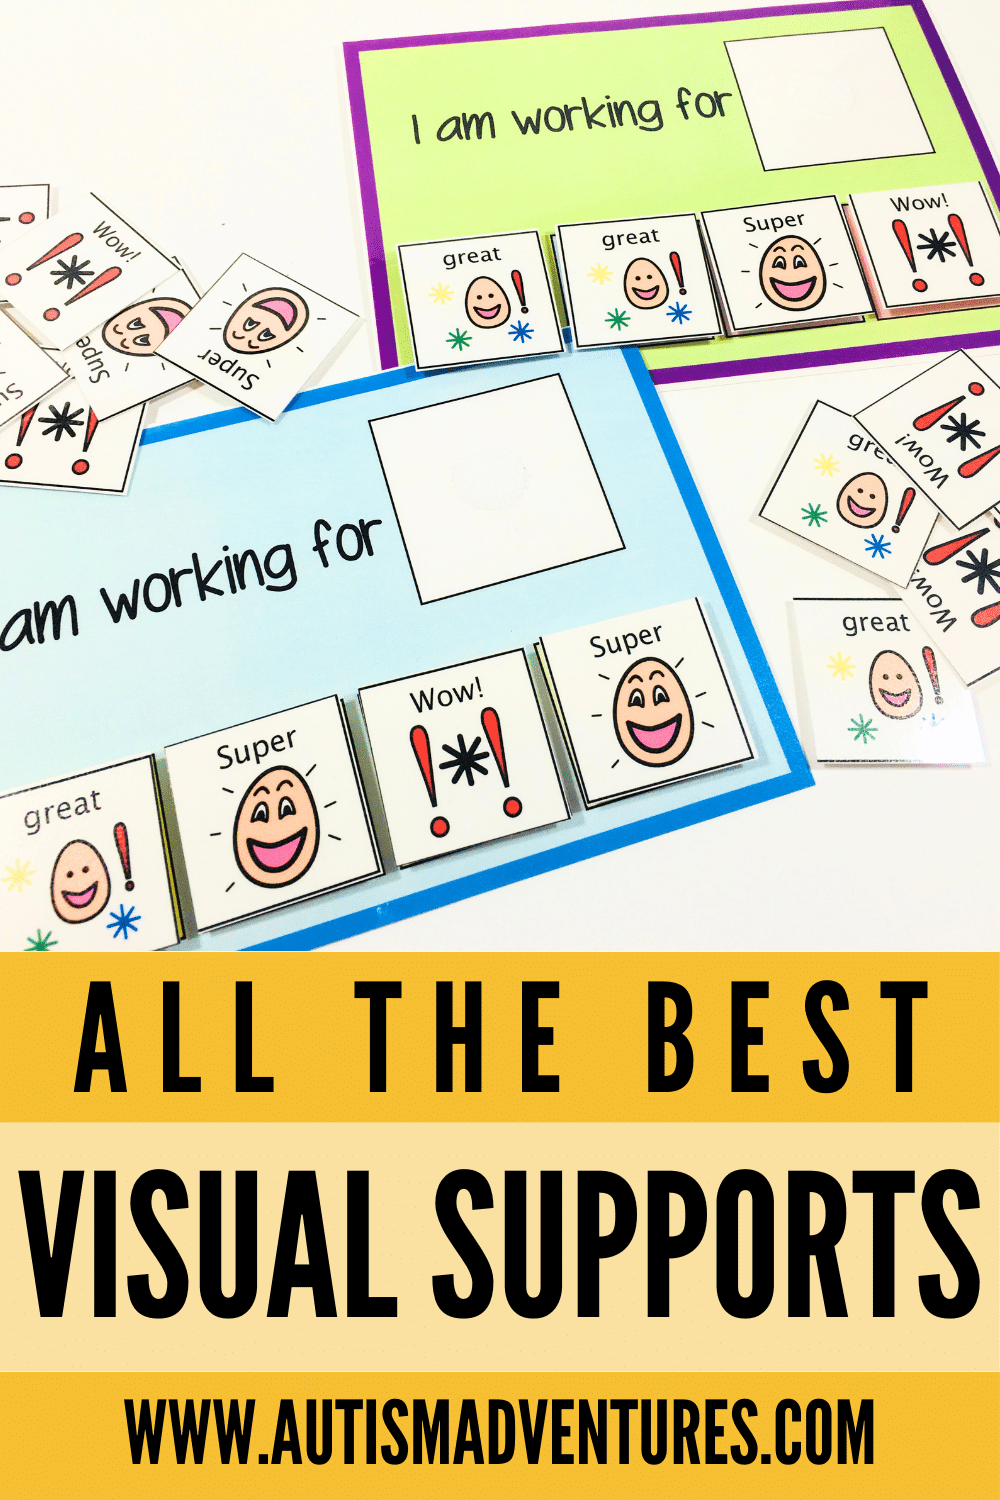
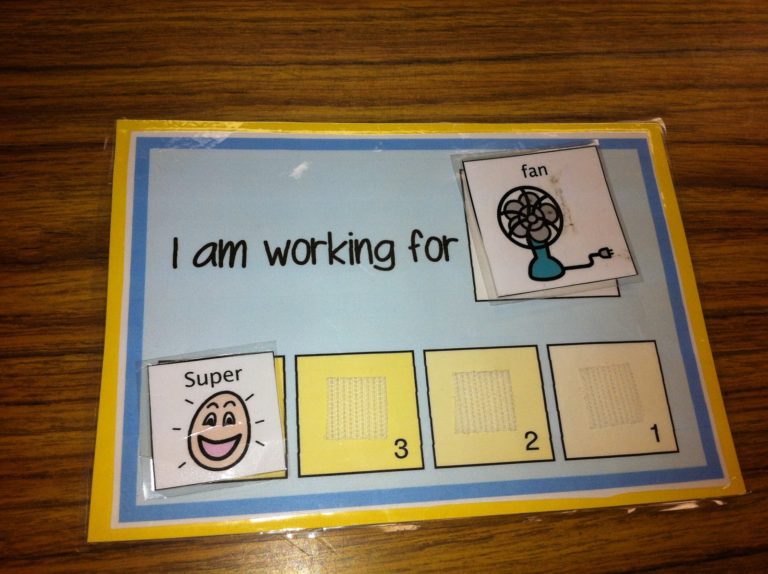
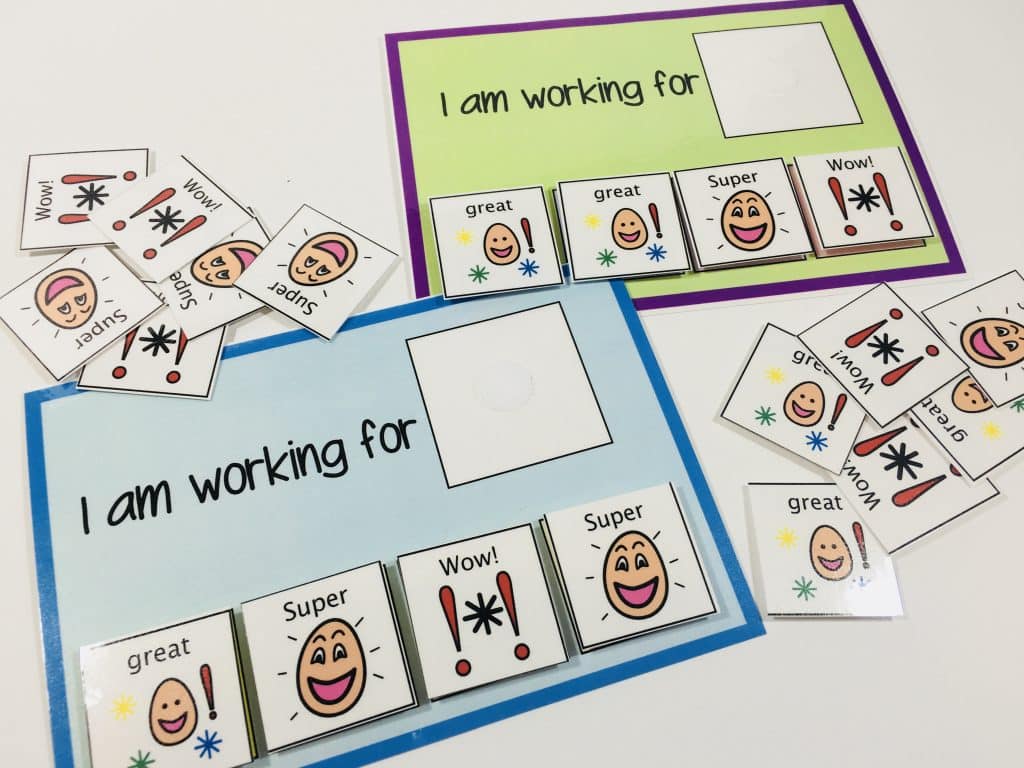
Working Cards
Behavior management is a big component to any special education classroom. Token boards can be weaved streamleslsy into your classroom and within your daily routine. The use of a token board can help students be successful within the school day by allowing them to earn rewards naturally when on task. I used a variety of working card and token boards within my classroom. Below are some examples of token boards I have used throughout the years:
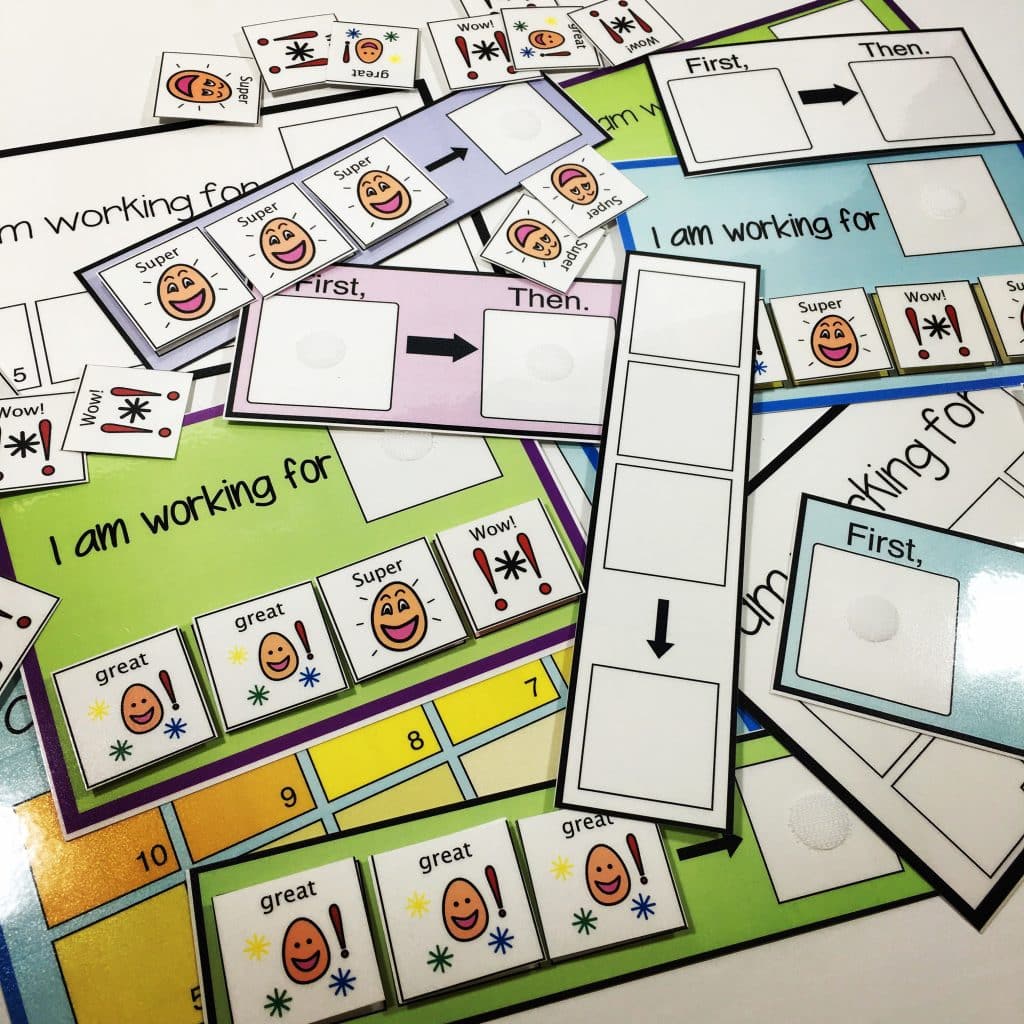
First-Then Boards
First-then boards, or the premark principal, is a best practice strategy for special education classrooms. The yard great visual cues to aide students in understanding the sequence of their day. It can also serve as a great motivator for students to first work/ then play.

Voice Volume Levels
This visual was created to provide visual supports for students who have difficulties regulating their volumes and voices throughout the school day. I also use three visual flash cards to provide non verbal prompts to students when they are being too noisy. I can simply move their star to the appropriate level so the student is aware of what voice level is appropriate at that time.
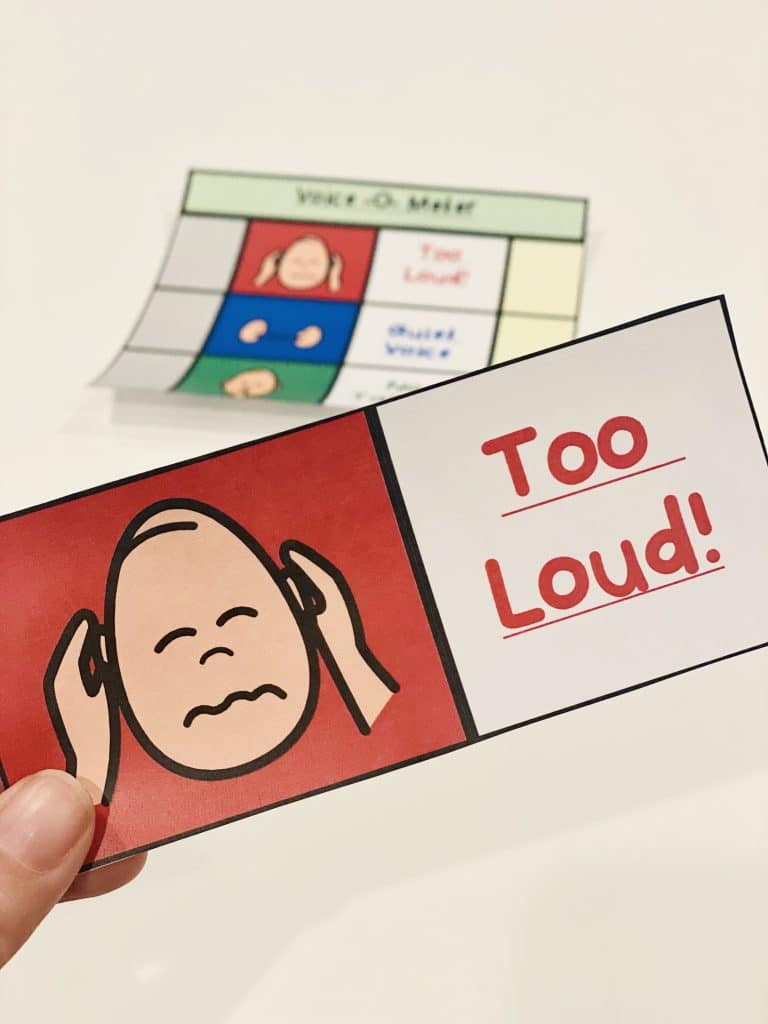
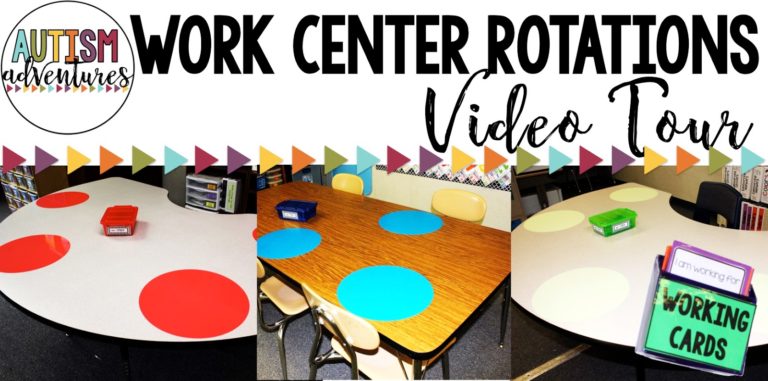
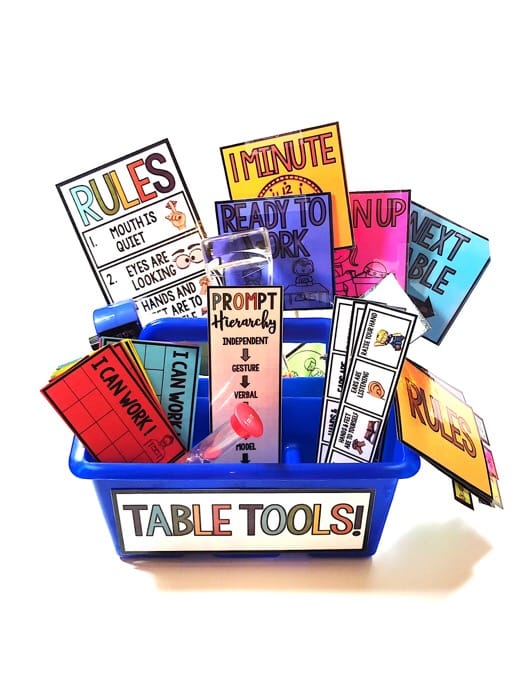
Table Tools
In my classroom, most of my core instruction took place in my work center rotations. To learn more about my work center rotations, read more HERE. Within each center I stored “table tools” to store all the visuals needed to run an efficient work center. To grab these table tools, click HERE.
Visual Tools in a Special Education Classroom
In conclusion, visual tools can be a powerful tool in any classroom. They can provide the support needed to help students become successful. To shop visual supports for your classroom, visit my shop HERE.
Like what you read? Don’t forget it, PIN IT!