How to Run Work Centers in a Special Education Classroom
Today’s blog post is all about setting up work centers in a special education classroom. I will go into the nitty gritty details about successfully setting up rotations in your classroom. We will discuss visual supports, lesson plans and the how to’s of setting them up successfully.
Over the years, I have fine tuned my work center system to make it efficient for students with special needs. The systems in place to run rotations start on the first day of school and continue every day of the school year. The expectations within each center can change daily and progress as students master new skills. I love my work center rotations because it promotes independence within your daily schedule.
Color Coded Tables
* This post may contain affiliate links. This means that if you click and end up purchasing, you pay no extra cost, but I earn a small fee for referring you.
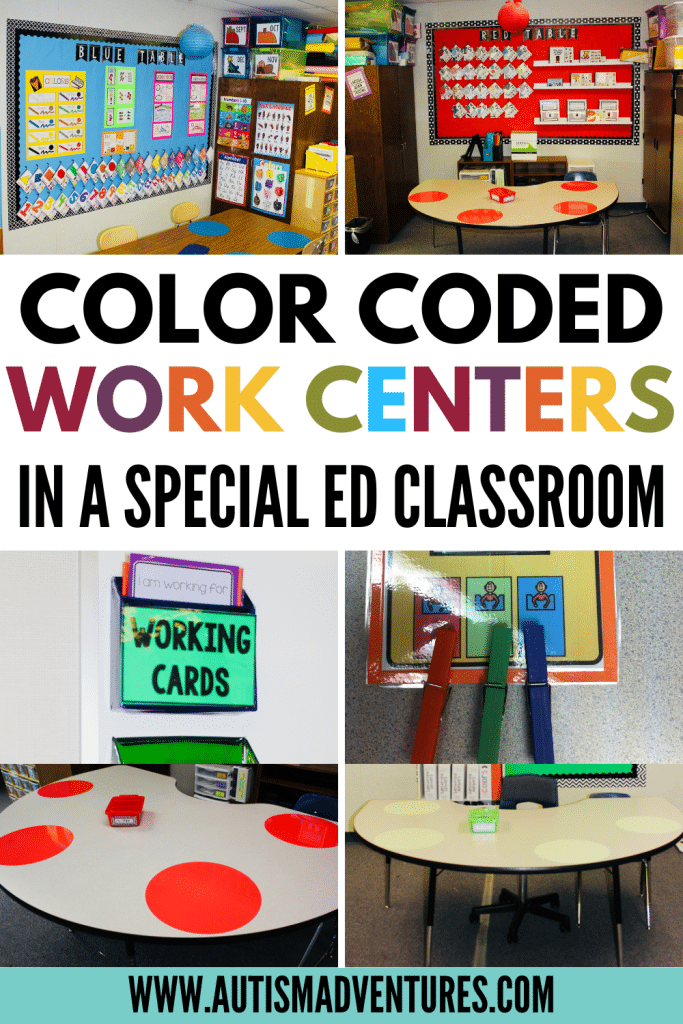
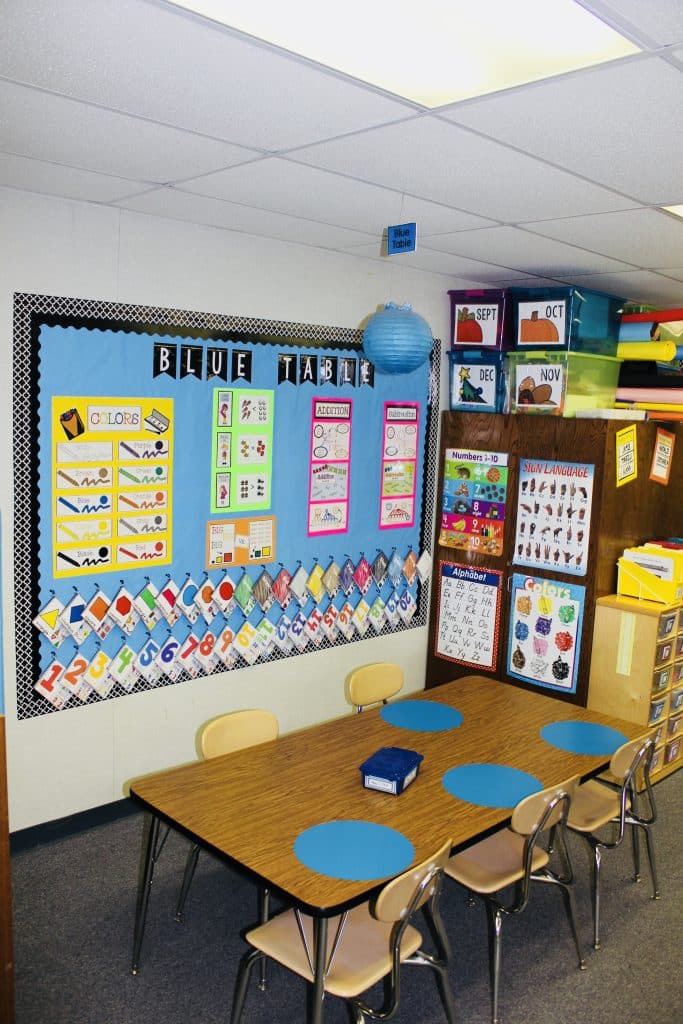
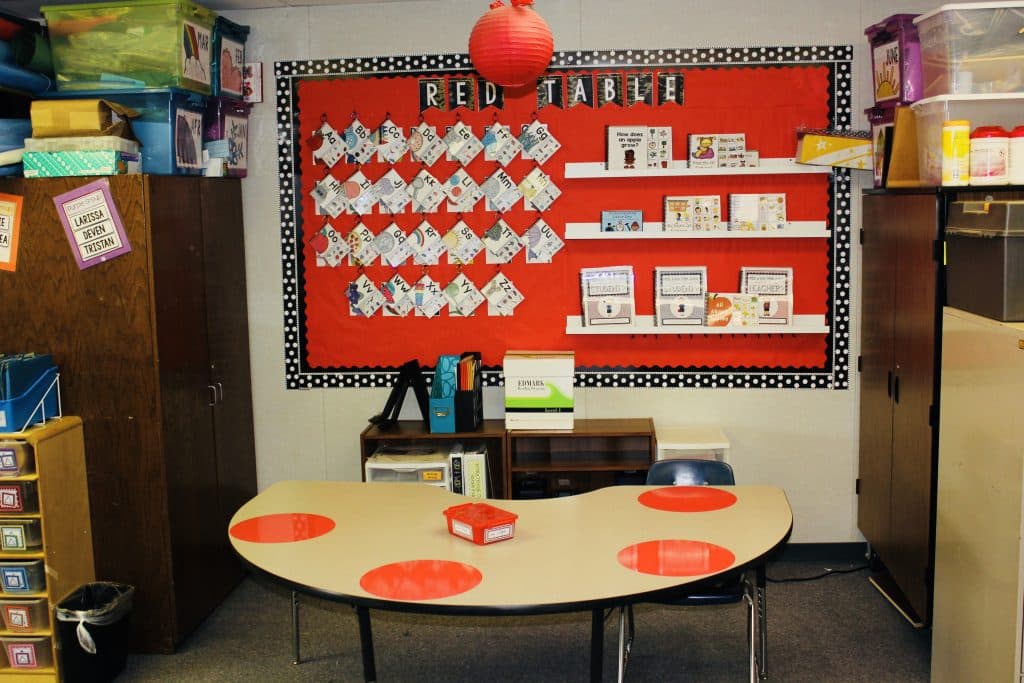
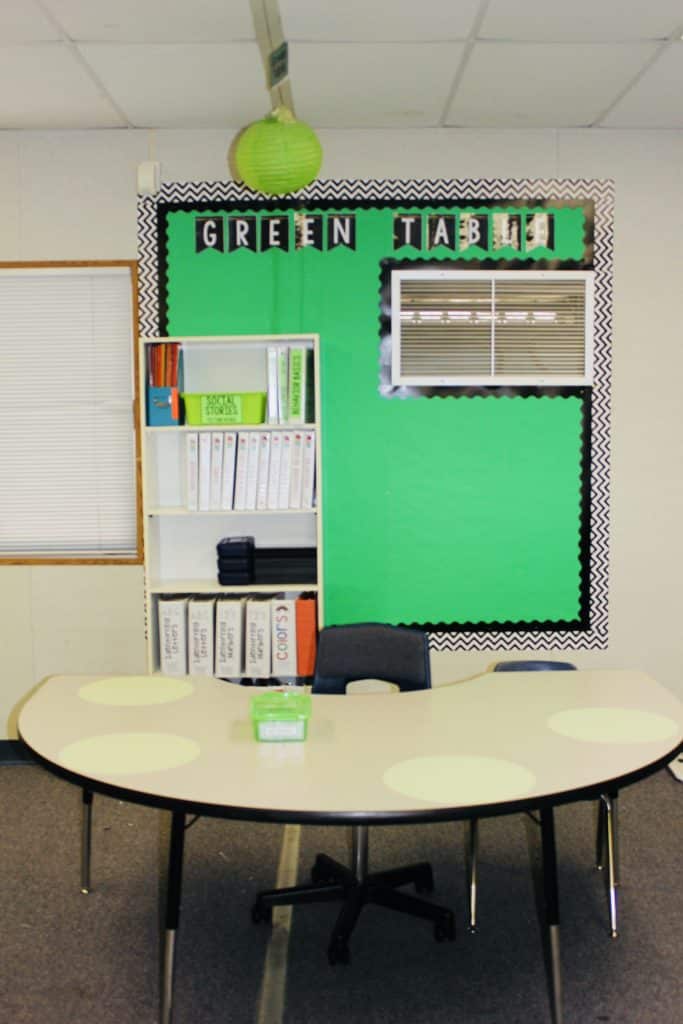
I have set up my rotations in a color coded system. In my classroom I had three work centers within the rotations. I had a “blue table,” “red table,” and “green table.”
Each table is clearly labeled with colored acrylic dots. These colored spots can be written on with dry erase markers too! You can grab them on amazon HERE. Each table also has a colored sign labeling each table hanging from the ceiling. Also, behind each table is a bulletin board matching the color of the table. There is no confusion knowing where each colored work center is in my classroom!
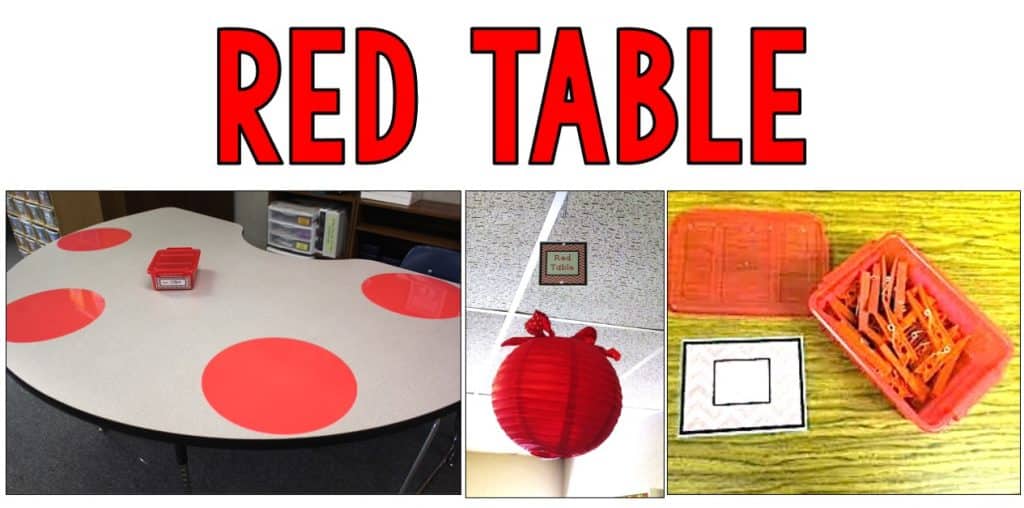
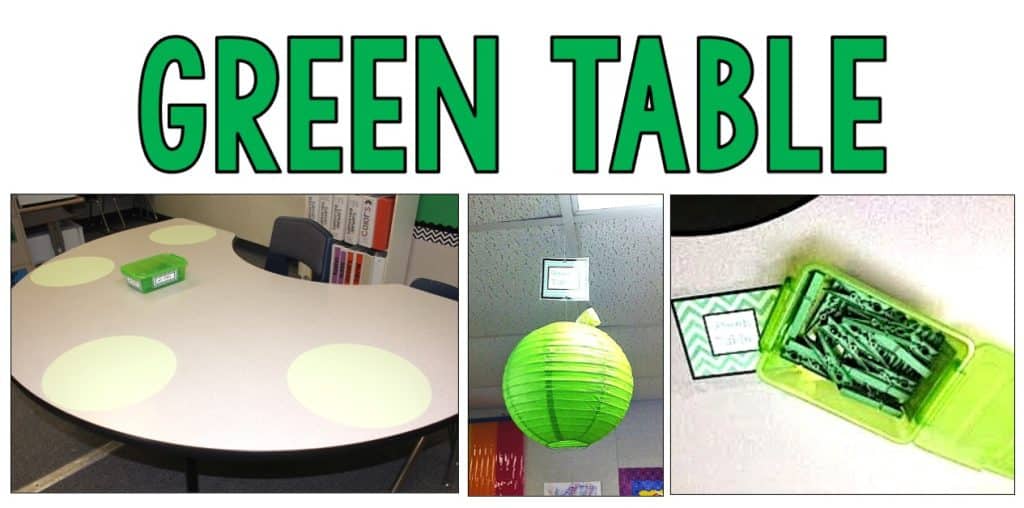
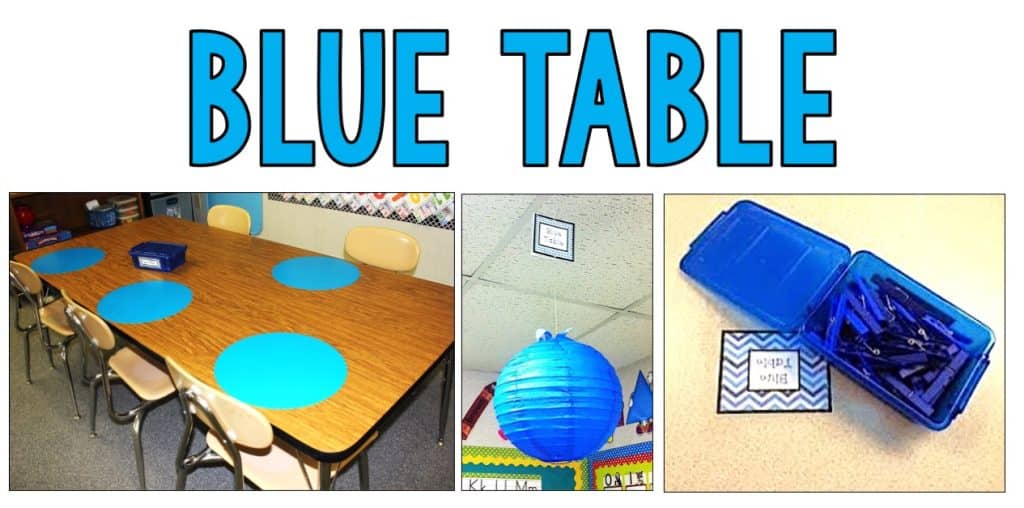
Getting Started
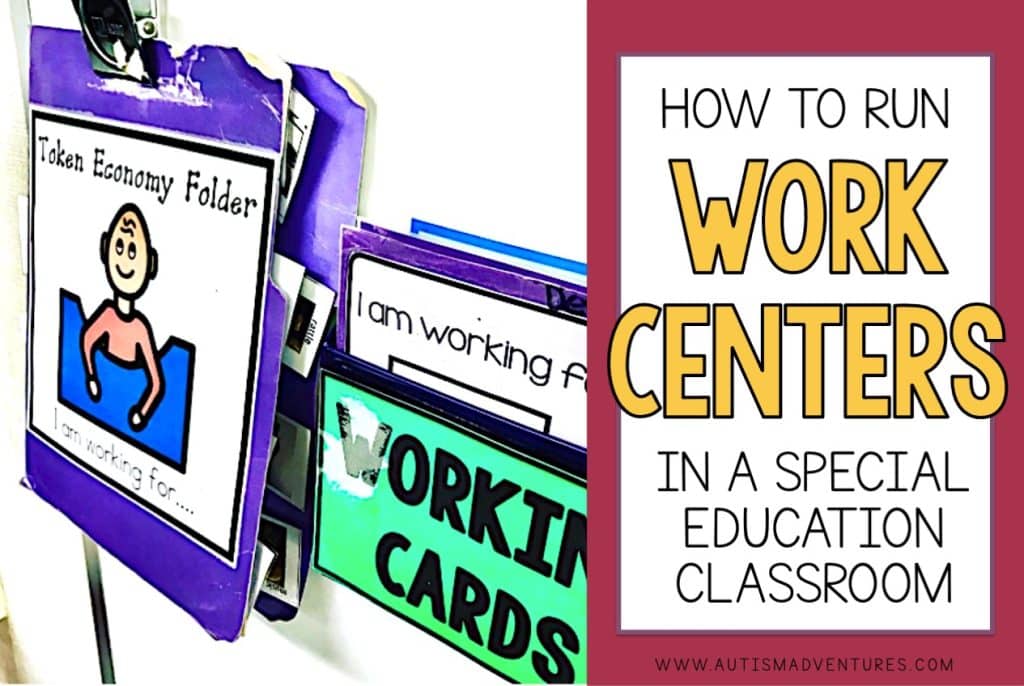
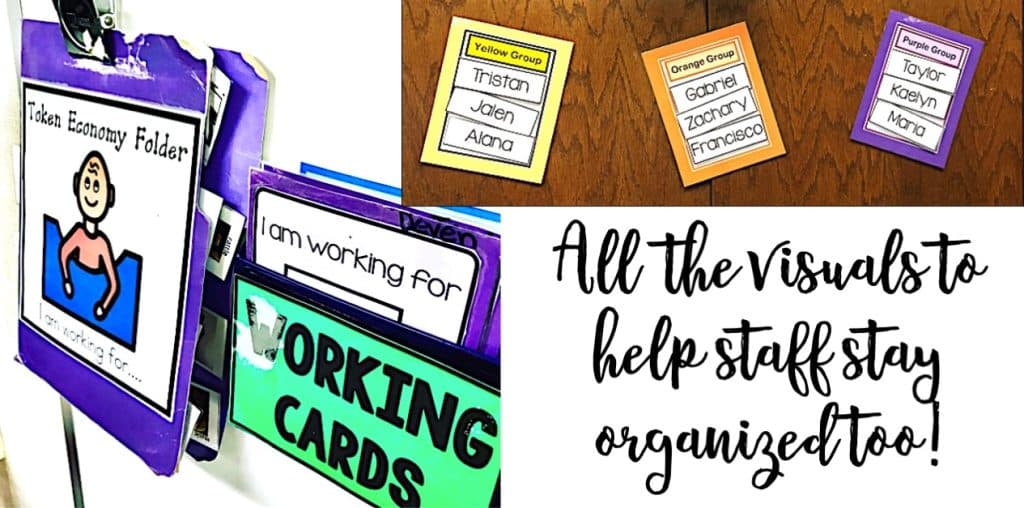
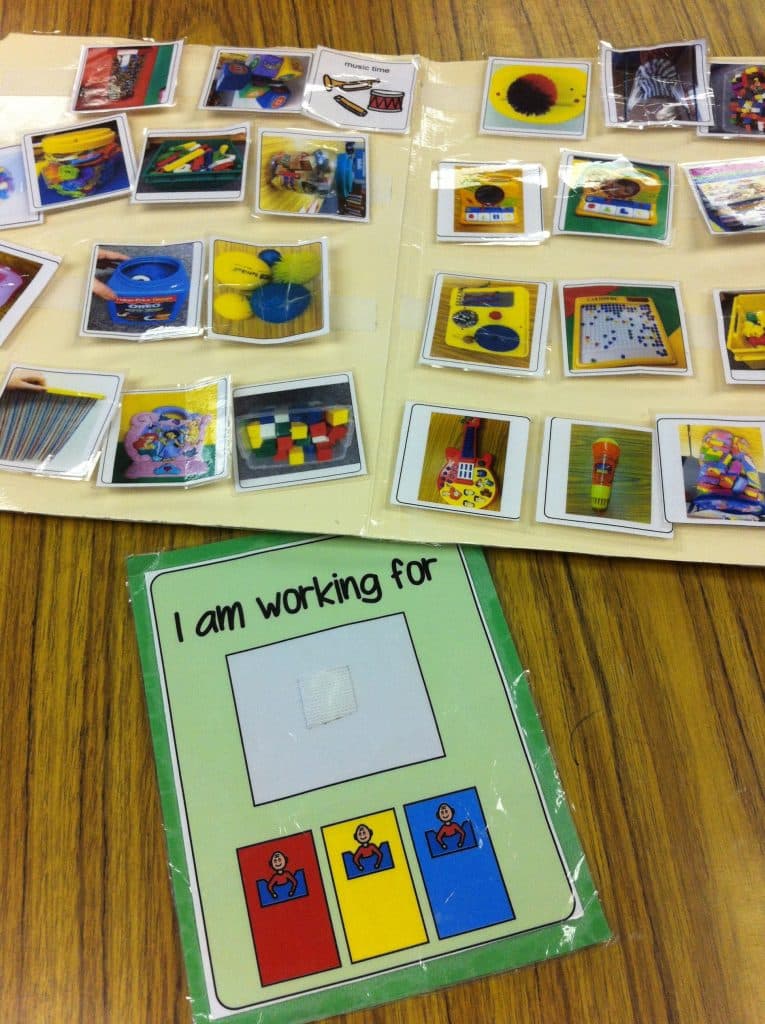
For me, work center rotations happened two times in my self-contained classroom. We had morning rotations, and afternoon rotations. Both rotations followed the same routine, the lesson plans and instruction just changed. As always, the first thing that takes place is students check their visual schedules and sit down to get their working card. They are passed out once they check their schedule. I walk around and let students choose a toy/activity that they are “working for” from my token economy folder. Working cards are stored in a magentic storage cubby on my white board. This keeps everything organized and streamlines the process of starting work centers.
Once all students have their working cards ready to go, we are ready to start. I had students grouped into 3 groups, (3 or 4 students per group). Each student group has their own group color: purple, orange and yellow. I have the student groups posted on the back cabinet in my room that is easily visible from the student desks. Student working cards match their group color so that everything stays organized and it is a great way to build independence.
Student Groups
Grouping students into groups may seem like a daunting task. For me, it varied every year depending on how I grouped students together. It might also change throughout the year if the groups aren’t working for you. It’s important to read IEP’s and IEP goals when creating groups. Do you want students grouped by academic ability, behavioral needs, communication skills or grade level? There is no right or wrong way to create student groups, as you know your students best. It also depends on the number of students you have in your class.
Working Cards
Working cards, shown below, are carried by the student from table to table with each transition between activities. Each groups card has visual cues on the bottom of their card. The cues tell the different groups of students which order of work center tables they will be visiting. For example, 1st Red Table, 2nd Green Table, 3rd Blue Table.
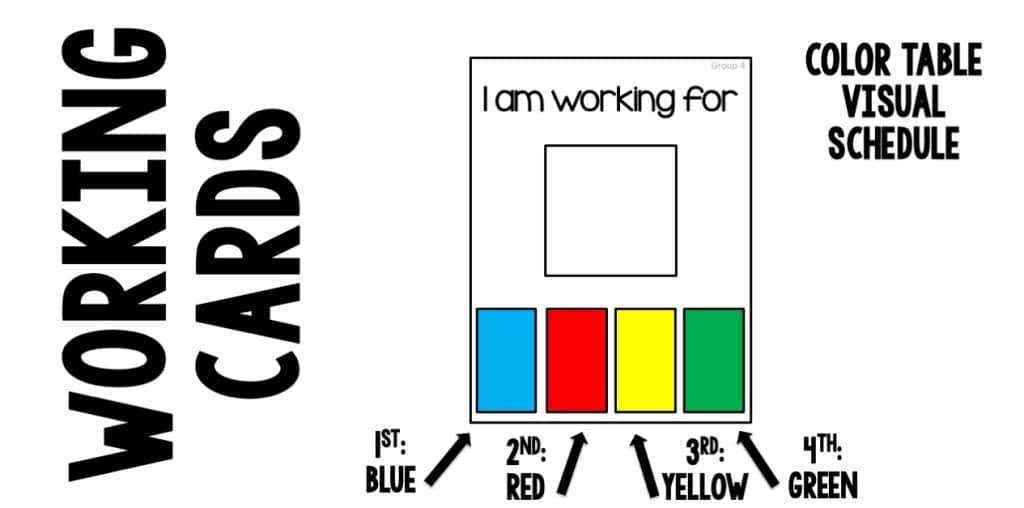
The work center rotation cards serve as a great reinforced throughout all of the rotations. When students are working on their activities, their visual working cards remind them what they are working for when work centers are complete. If a student become unmotivated, staff members can simply point to the working card as a quick reminder of their reinforcer.
Token Economy
At the end of each tables activity, the small group receives a colored clip (matching the colored table) to act as a token. Three clips are earned throughout the entire work center rotation system. Students are then able to turn in their working card in exchange for their reinforcer that they chose.
We spend a total of an hour doing work center rotations in my classroom. This can vary slightly depending on the needs of the student or the classroom schedule for the day. Within the hour of work centers, we spend 15 minutes at each rotation. This includes the transition to the next table as well. 15 minute rotations at 3 different tables totals 45 minute of direct instruction at all three tables.
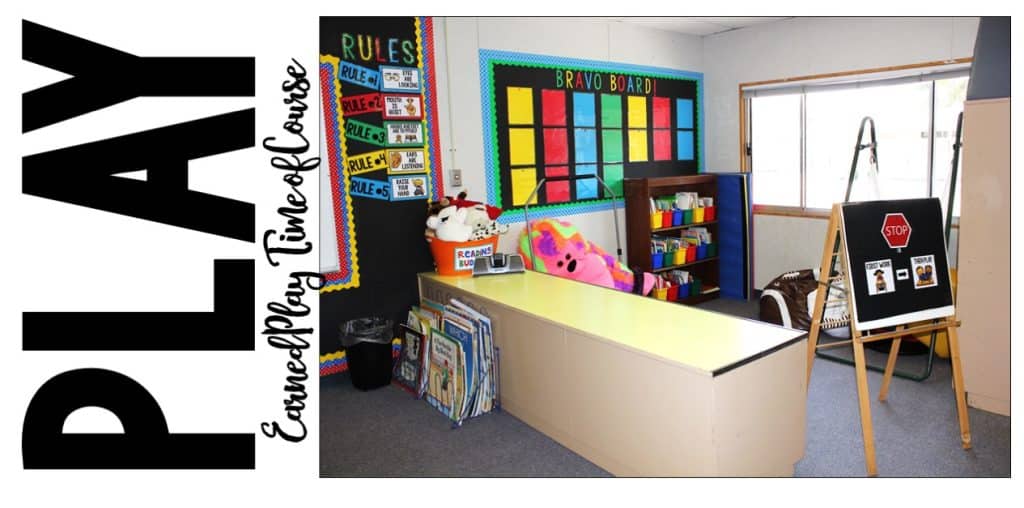
The last chunk of the hour of work centers is for the students to earn and play with their reinforcer. While students are playing with their reinforcer, staff members can clean up work centers and put away any work tasks or classroom materials that are still out. If a student had trouble earning a clip at any of the tables, this is when they return to the work center to complete the task.
Student Rotations
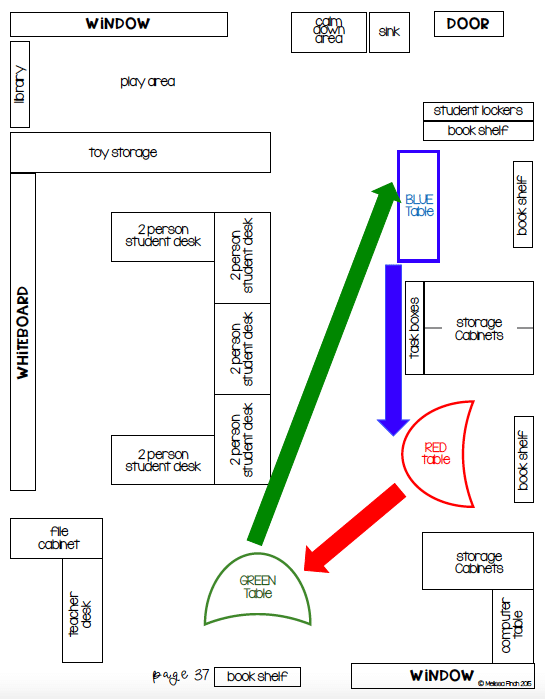
I know I have done a lot of talking about students rotation from table to table. I wanted to create a simple visual of my classroom, how the tables are laid out, and the path students take to rotate from table to table. Here is a little visual to help you understand the rotations in my classroom.
What do Students do at each rotation?
I’ve spent the entire post discussing they systems in place for rotations. We discussed creating small groups to maximize your work centers. We discussed building student independence with the use of working cards. But, what do the students actually do at each table?
Well, short answer, whatever you want! Each special ed classroom will tweak work centers slimly to meet the needs of their students. For me, we did work centers twice a day, morning and afternoon. That means I had a total of 6 centers to plan on a daily basis. Depending on classroom staff, some centers may be independent work systems while others may be direct instruction at math centers. Again, this is going to vary with each class.
Work Center Work Ideas
Start with your core subjects. For me, I always had a math center, language arts center, and writing center. This is where classroom staff assisted on working on IEP goals and direct instruction on grade level curriculum. With my other three tables I integrated different subjects and life skills my students needed to work on.
One table was always the task table. At the green table students worked on my binder tasks to build independence and reinforce the skills they were working at the other centers. Within this center I also implemented a file folder section and task box system to meet the needs of my students.
Another work center was designated for my behavior basics curriculum. At this table we worked on social skills, classroom rules and various social emotional learning skills. We focused on one behavior a week. To learn more about my beavhior basics curriculum, click HERE.
Other skills that I would incorporate into work center rotations were vocational skills, fine motor skills and arts and crafts. These would change depending on the needs of the students at that time of year. It’s important to note that the entire class did the work center rotations, no matter the skill of the student. The work at each table would be differentiated for each group so that students were working towards mastering their IEP goals.
Video Overview
Below is a video over view of our work center rotations to help you get a better understanding of my work center systems.
Questions to Ask Yourself Before You Get Started
I feel like special education teachers either have a love or hate relationship with work center rotations because if not done so correctly, it can be pure chaos. Sometimes I hear stories of absolute chaos, and other times its a seamless rotation system where create direct instruction takes place. And of course, there are some teachers that fall somewhere in the middle.
Before you get started at setting up work centers, ask yourself these questions:
- Do students know where to go during work centers?
- Do student’s know what’s expected of them during work centers?
- Are your work centers organized?
- Is student work/tasks ready when they arrive to the work centers?
- Is your work center routine consistent?
Do Students Know Where to Go?
It might sound like such a silly questions? And you are probably thinking “of course they know where to go.” But do they really? Do students know where to go and when to go without multiple verbal prompts? Think about it…if you have 10 students and only 2 of them independently transition without any verbal cues, that means you have 8 students that require at least one verbal direction. Do your aides chime in too? If so, that can be easily 20+ verbal commands of telling students within a minutes time. Even thinking about it overwhelms me!
They can hear:
“go here”
“come here”
“Sit there”
“Switch with susie today.”
This can be EXTREMELY overwhelming for students and even staff too. If this process is not streamlined you are already setting students up for failure from the beginning. Students should be arriving to their table calm and ready to work. Sometimes this requires some redirection to your staff as well. Staff may need some friendly reminders to cut the verbal reminders down to a simple gesture or cue as well as give the students a chance to be successful on their own. Now, of course, I know there will always be SOME students that require the extra help, whether its physical or verbal, and that is OKAY! But save those cues for the students that require them.
This is where I like to use visual work center rotation cards. The cards help act as a cue for students without ANY verbal redirection by staff. This work center card can be edited to create the colors you use in your classroom in addition to the number of tables you use!
In addition to the tables being clearly labeled, it can make things easier if the tools and supplies are also labeled. I recommend storing all of your “table tools” in one caddy that is clearly labeled for yourself or instructional assistants that run that work center rotation for you!
Do Students Know What is Expected of them During Work Centers?
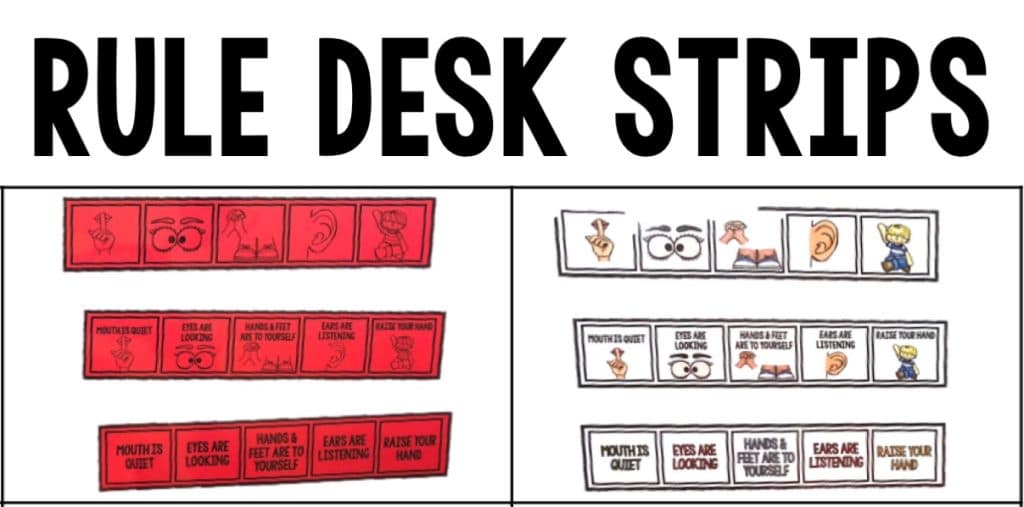
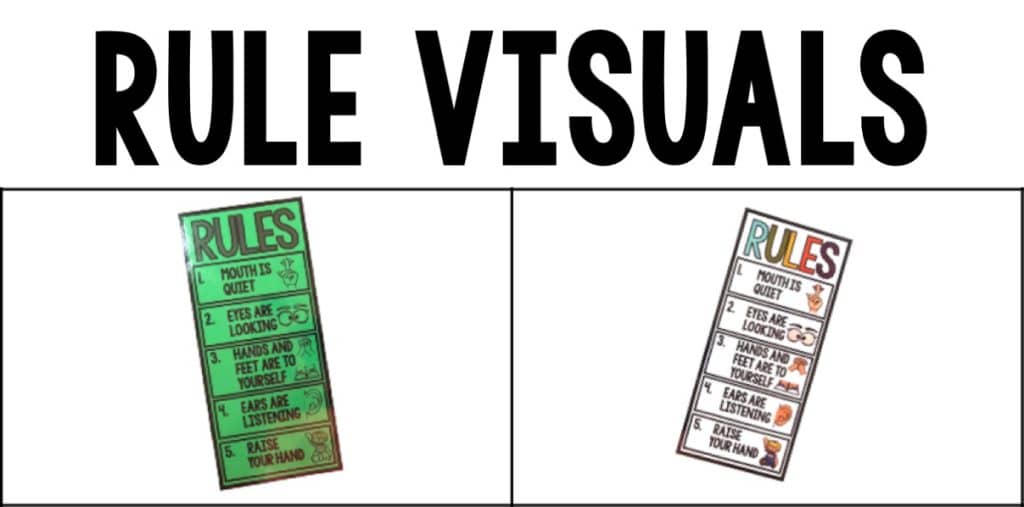
In a perfect world, your students will transition to their first table with zero challenges. When they do this, do they know what is expected of them at the work center? We want to set students up for success and set clear expectations. Depending on your caseload, student needs and individual behaviors you can consider using different visuals to help keep students supported. Here are a few visuals I have used:
These can be taped on student desks or table spots so they cannot be removed.
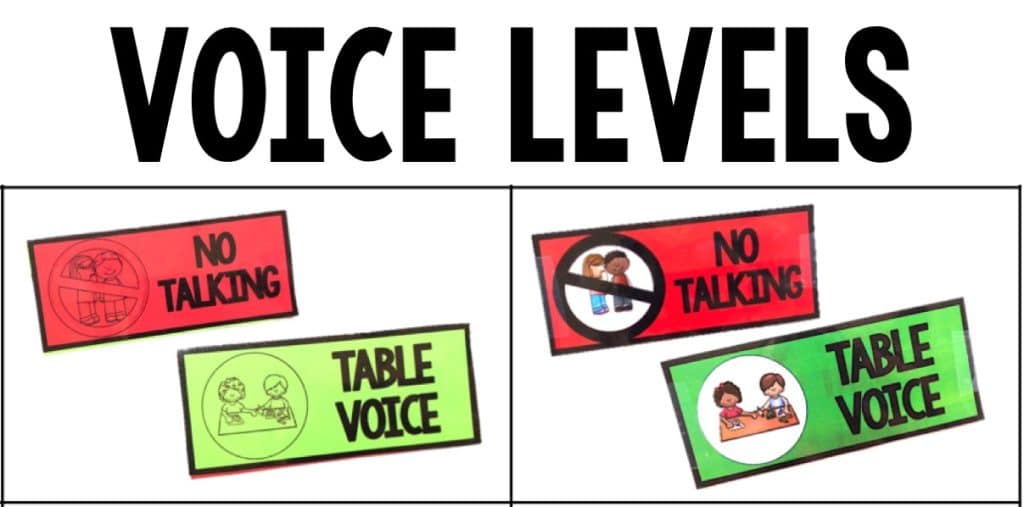
Voice Levels
Classroom management is key to student success within your work center rotations because depending on your kiddos they may be a little chatty. Many times I visit a classroom to offer support for behaviors and one of the most obvious recommendations I make to the staff is to reduce verbal redirection. If a student is being loud, and 3 adults tell them to be quiet, the overall voice level of the classroom is too high and thus stimulating. I always try recommending using non verbal cues such as these voice level visuals to help prompt students to be quiet. Of course, some students will require a verbal prompt. However, not ALL students need to be “shhhh’d”
Rule Visuals
What is the realistic expectation for students? Do you token students individually? Do they earn clips at each center like my work center rotation system? If so, set expectations up from the beginning. My work centers always worked on the principal of first work, then play. Students would earn clips at each work center and turn it in for their preferred reward. Whatever method you choose, keep it consistent for your kiddos!
Are your Work Centers Organized?
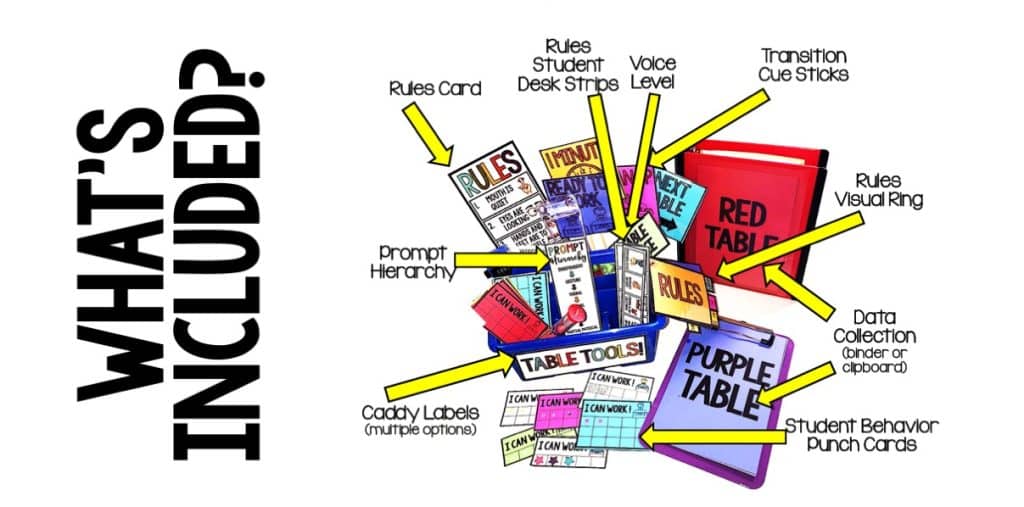
Work centers should be efficiently organized so that you are not scrambling around during work centers to grab materials or tools needed. The obvious things should be kept nearby: student work, student work cards, token boards, timers, visuals and table tools.
Each center in your classroom should have a table tools tote. In this it is beneficial to store all of the materials you need to manage work centers. Its important to have staff help you keep work centers clean and organized. Staff expectations should include managing materials and putting things away. When students are on break or down time, staff can be utilized to organize centers, tidy up where needed and set up for the next round of work centers.
Here is a sample of my table tools I used in the classroom and recommend to teachers I work with:
Work Center Summary
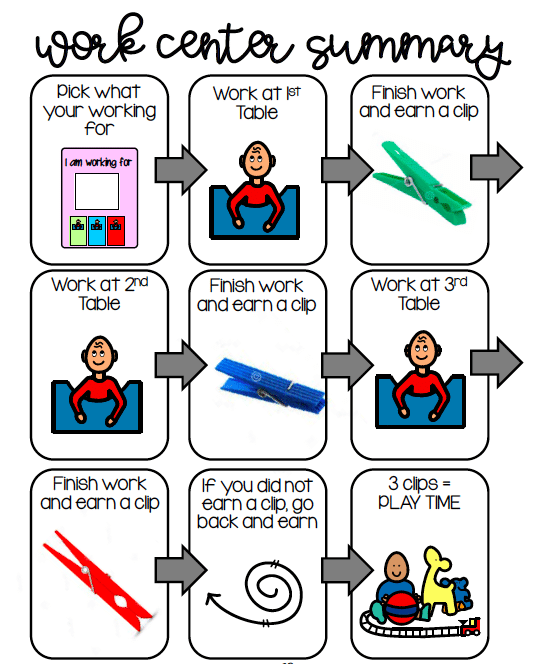
All in all, I love my work centers. It is a fun way to implement core instruction in small groups so that everything is maximized in your classroom. I have fine tuned it over the years and I truly believe students are able to be successful with the supports implemented within mh work center routine. To grab my work center rotations materials to use in your classroom, click HERE.
Here is a work center summary for you to understand our work center system.
Like what you read? Don’t forget it, PIN IT!
