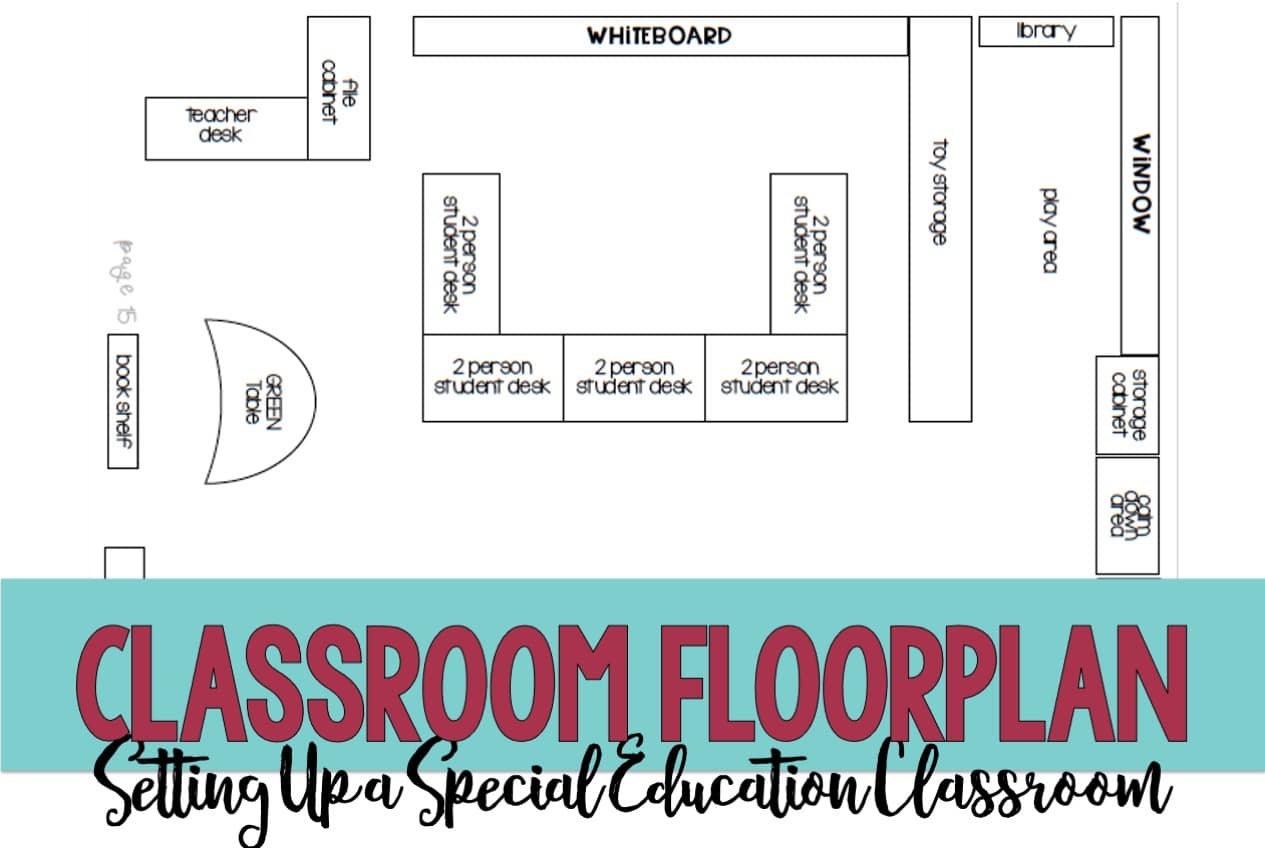
Classroom Floor Plan- Setting Up A Special Education Classroom
Today we are going to discuss designing a classroom floor plan for your special education classroom. There are a few simple steps you can do to maximize your classroom with the furniture you are able to get your hands on. Throughout this post I will provide a simple guideline to help you set up the perfect floor plan for your special education students.
It is important to create a classroom environment that will meet the individual needs of your students because it is imperative to have your systems, routines and classroom floor plan in place for the first day of school. This helps create consistency from day one.
Why is the Floor Plan so important?
When you first start thinking about your special education program, the first step to setting up your classroom is getting the physical layout set up. The classroom floorpan sets the tone for all visual supports and visual aides you will be utilizing throughout your classroom as well. It can also create natural physical boundaries within your classroom to minimize distractions and maximize student efficiency. If done correctly, you can strategically use your floorpan to encourage a successful year.
Brainstorm Questions
Before you get started, brainstorm a few questions as to how you would like to run your special education classroom. Here are a few questions to ask yourself about your classroom floor plan:
- How many students will you be servicing on a daily basis?
- Will you be using individual desks? Will they be using group tables instead?
- Do you want to have a teacher desk?
- Where will students store their personal belongings such as jackets, backpacks and lunches.
- Where will students line up?
- What technology will you have in the classroom? Where will technology be stored?
- Where will whole group instruction take place?
- Will you utilized independent work systems?
- Will you provide a play area for students?
- What will sensory integration look like in your classroom?
- Where will your visual schedules go?
- Do you want a designated space to work with small groups?
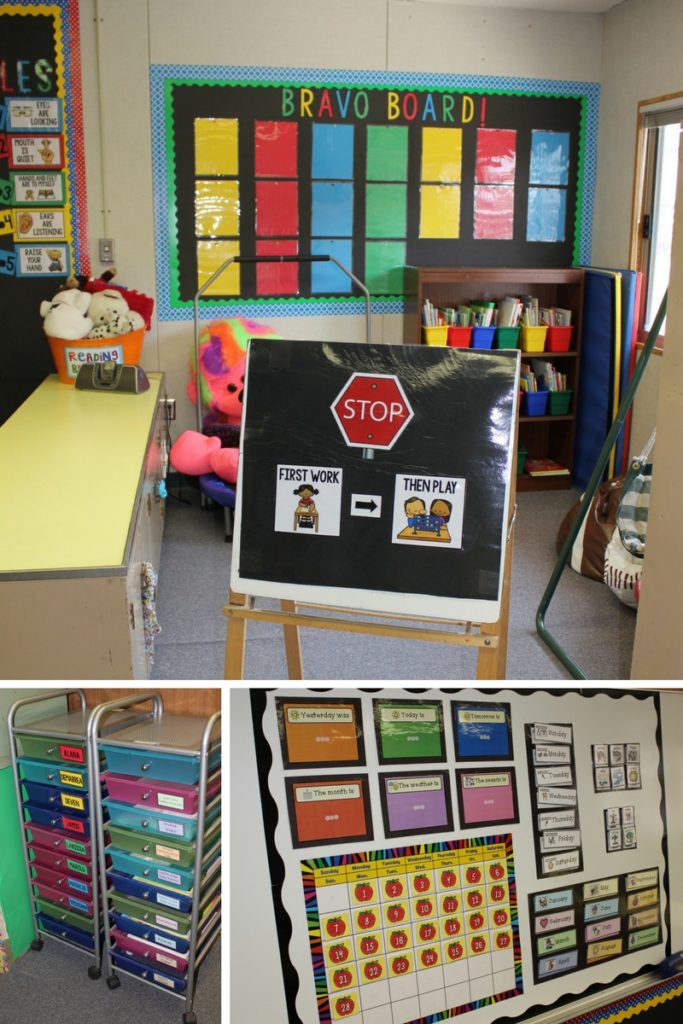
- Will you be setting up a calm down area for students?
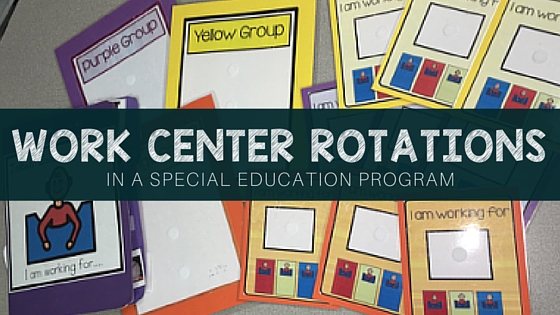
- Will you be color coding your classroom? This could be color coding per student, per grade level, per subject, per small group or per work station. To read more about my color coded work rotation system, click HERE.
- How many staff will you have in your classroom? Where will staff store their belongings?
- Where are your classroom outlets?
- Do you have access to a district warehouse with furniture?
What Kind of program do you want to implement this year?
There are a variety of ways to set up your self-contained classroom. Really, there is no right or wrong way to do so. Each classroom will be different and the needs of your students will also be different. There is no “one size fits all” when it comes to setting up your special education classroom floorpan.
Here are a couple of the best ways to set up your classroom:
- Small Group Layout: This would be suitable for a teacher that wants to teach in small group rotations only. To learn more about how I run work centers in my classroom, click HERE. This could be paired with a whole group sitting area on a rug so that you have the opportunity to work in small groups as well as whole glass.
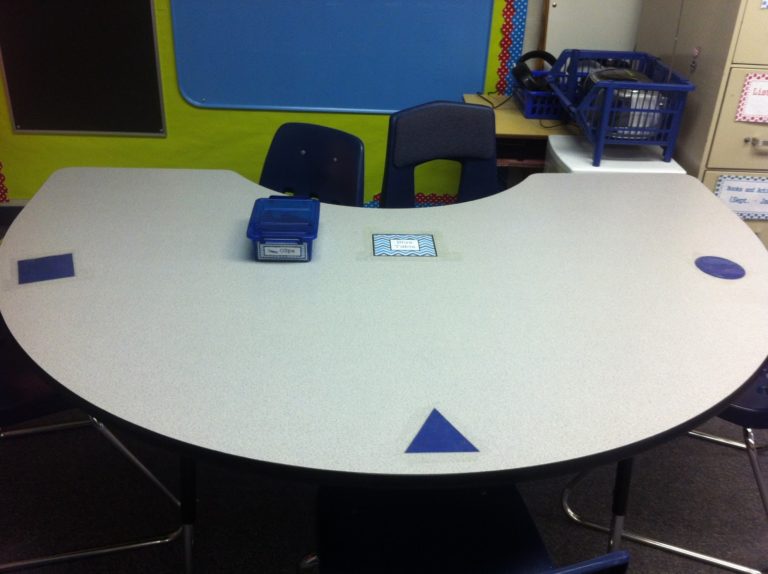
- U-Shaped Layout. This is suitable for students who are able to sit in a desk independently with or without supports. This is optimal for a teacher who would like to do a variety of whole group activities and instruction throughout the day. In my classroom, I utilized a U shape layout of student desks paired with small group rotations at kidney tables.
- Station Based Layout. This is suitable for a teacher that wants to run their classroom solely on a station based program such as independent work stations using the TEACCH method. This could combine a variety of methods or be limited to just the TEACCH program.
Classroom Must Haves
Here are a few items I would consider to be a “must have” in any special education classroom no matter the various needs of the students. Consider this when designing your classroom floor plan.
- Alternative seating. This could be bean bags, wiggle chairs or bouncy balls. The sky is the limit depending on the student needs. Working with your school OT could be a great resource for you. To see some of my favorite alternative seating options, click HERE to learn more.
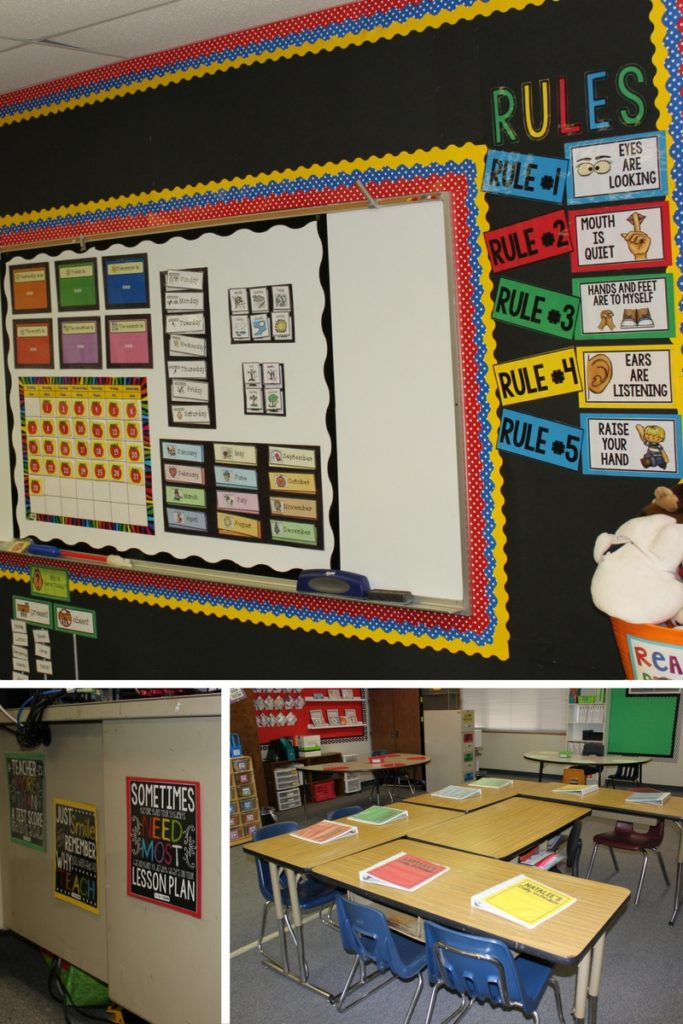
- Visual schedules. Visual schedules are a must in any special education classroom. Your classroom layout must have easy access to student visual schedules. To learn more about visual schedules, click HERE.
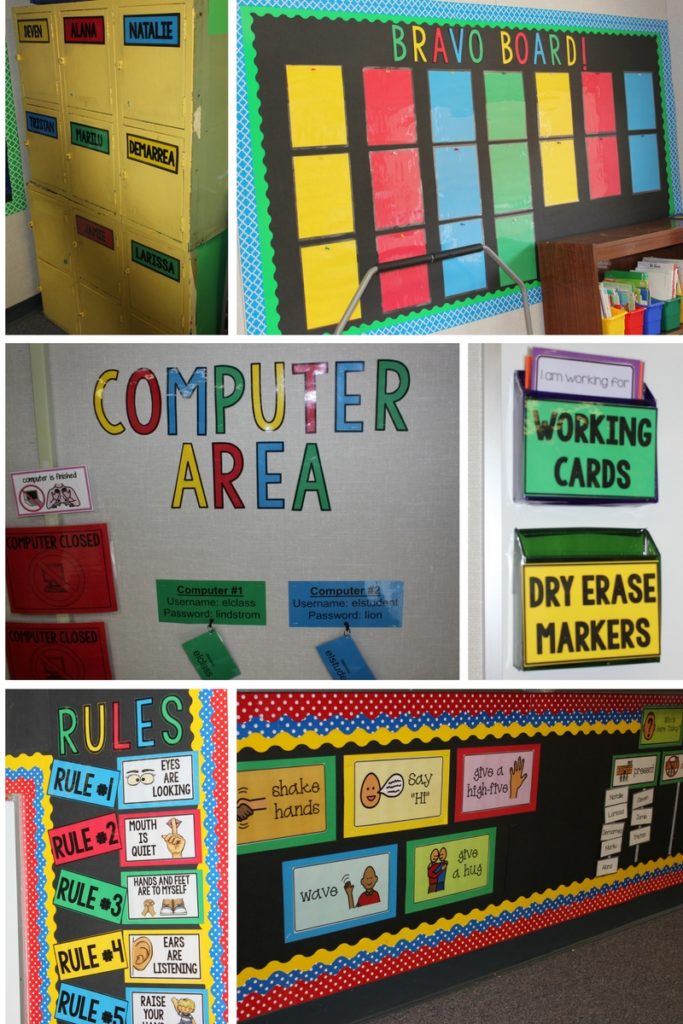
- Assistive Technology. Assistive technology is a must for any special education classrooms. Consult your student’s IEPS to see what equipment is listed for each student. This could be switches, speech to text software, adaptive seating, slant boards or any communication device. These are classroom must haves in itself. But more importantly when designing your classroom you must have a “home” for this equipment so that it is readily available to students when it is needed.
Setting Up the classroom Floor Plan
* This post may contain affiliate links. This means that if you click and end up purchasing, you pay no extra cost, but I earn a small fee for referring you.
Now that we’ve discussed a lot of hypothetical options, it’s time to get down and dirty and move those tables, desks and file cabinets until you feel that you have establish a good environment! Take into account the questions above you brainstormed about to descide what program you want to run. Consult with admin to learn how many staff members you will have in your classroom. Review IEP’s to learn of any student equipment will be stored in your room.
With all this in mind you can start setting up your classroom by starting with the non-negotiables. What do you not have control over? This may be a sink or outlets. Once you have arranged your non-negotiable, refer back to the brainstorm questions above. Arrange the big furniture first. Set the core parts of your instruction up first. From there, you can fill in the smaller furniture pieces that may be “accessories” to your larger items. This may be rolling carts with storage to support the larger kidney tables for small groups.
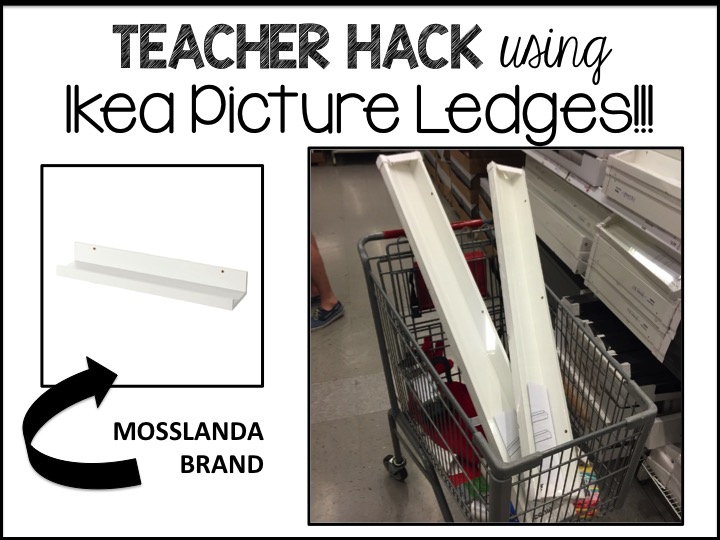
I recommend these furniture movers that can be bought on AMAZON, because they make moving furniture around easy. Even with help, these moving pads make everything just SLIDE!
Follow Up Questions to Ask Yourself
Now that your classroom furniture is set, it is time to step back and analyze your work. Does it look good? Does it feel good when you walk around? I want you to take a day off from working in your classroom and revisit it. When you walk back into your new floor plan, I want you to ask yourself the following questions:
- Is your classroom floor plan assessable for all students?
- Are classroom supplies assessable for all students?
- Is there a lot of visual clutter?
- Does your floorpan set up bulletin boards to be used in an efficient manner?
- Is your classroom safe?
- Does your classroom floorpan allow for good classroom management.
- Does my classroom allow for collaboration between a variety of service providers? Will service providers be needing to use a portion of your classroom? Will service providers be required to push in?
I hope you found this post helpful. Special education teachers have a challenging job meeting the carrying needs of their students each year. This includes the simplicity of classroom furniture. The needs for your classroom layout is also likely to change year to year as the needs of your students change.
Furniture Used in my Classroom Floor plan
- teacher desk
- a desk/chair for each student
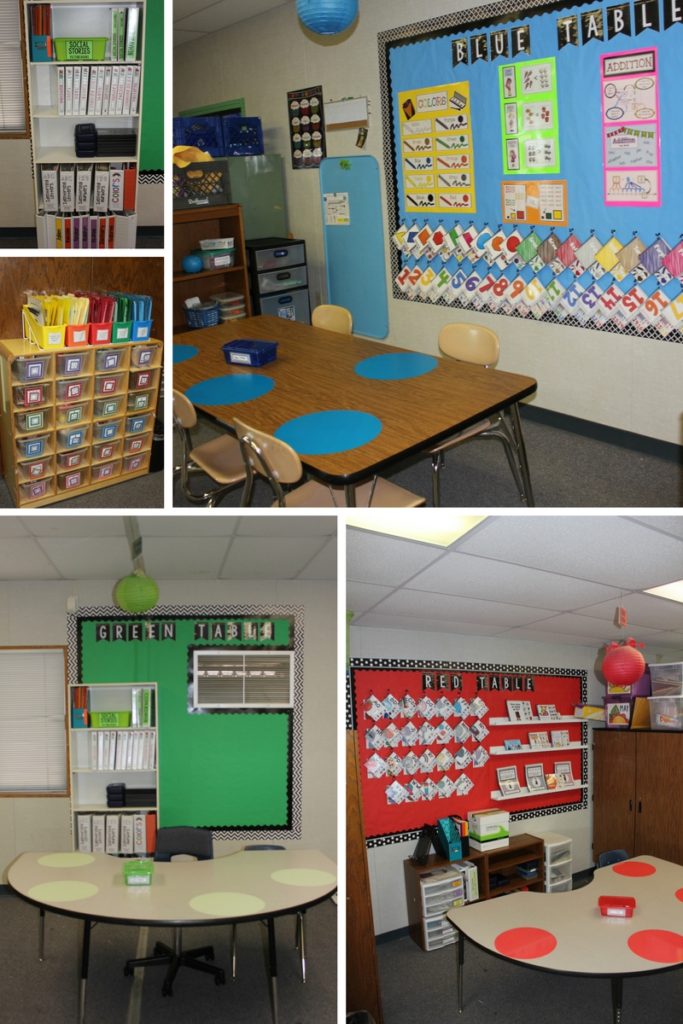
- 3 kidney/large center tables
- small desk for calm down area
- cubbies/lockers/storage for student belongings
- book shelf/library
- computer table
- file cabinets/storage cabinets to section off the centers
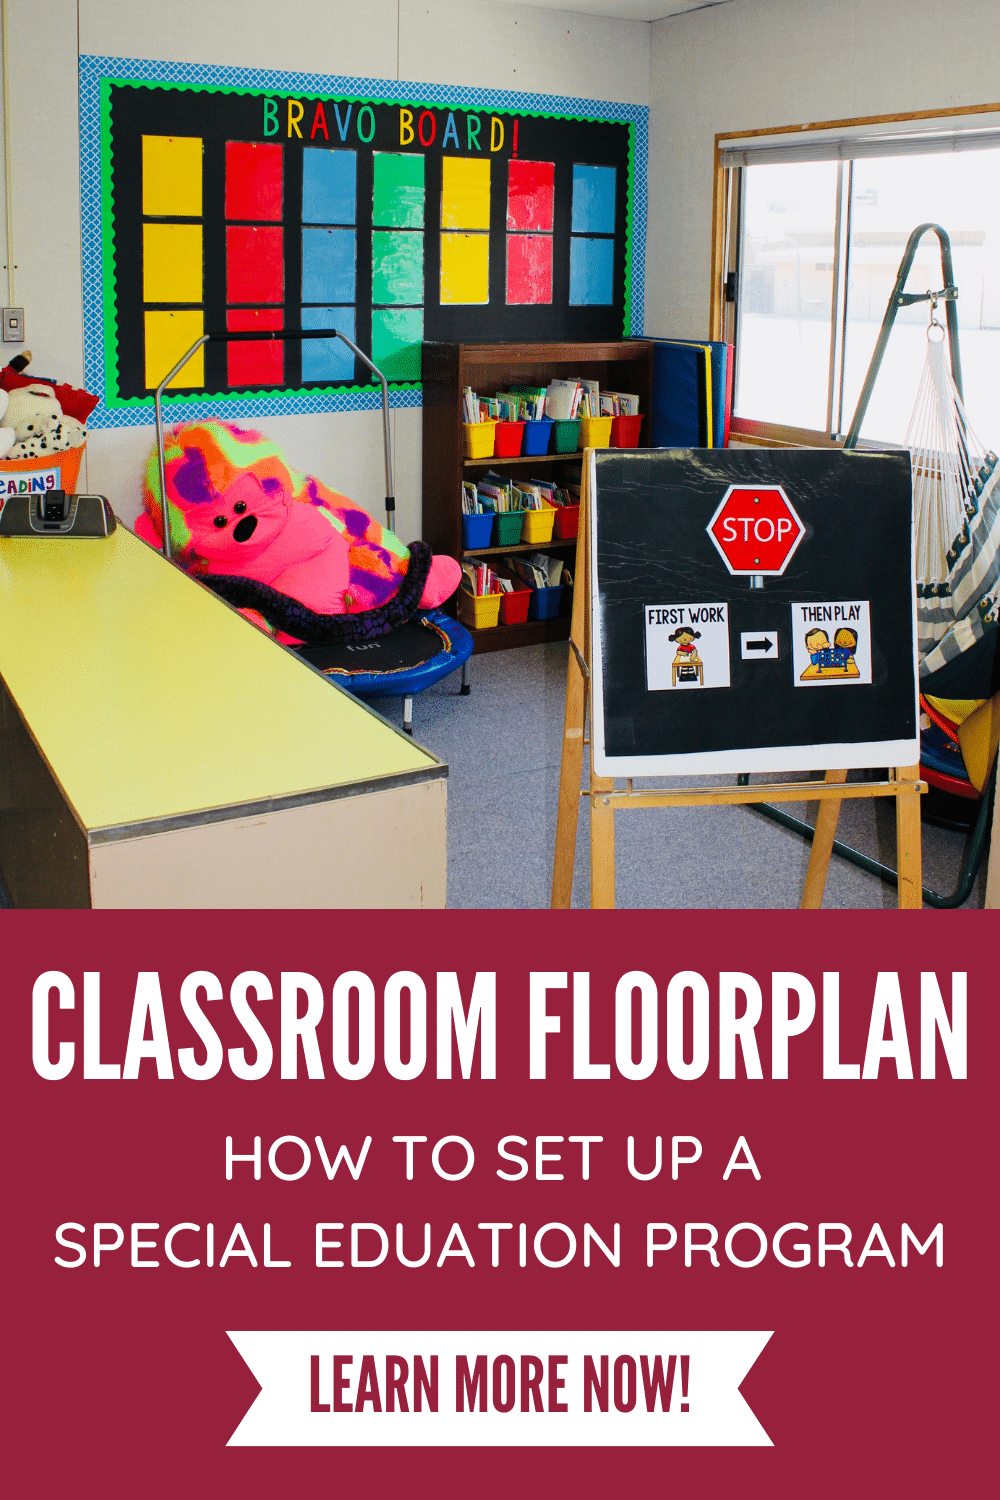
Pictures of my classroom floor plan
I want to take a minute to share some photos from my classroom one year that had a floorpan that REALLY worked! Below are some photos of my classroom that showcases how I used different pieces of furniture to create “areas” to makes learning less distracting. All my years teaching were one in a bungalow that was a simple rectangle with no amenities. That made my floorpan designing process easy but also difficult. I had a blank slate with no built ins, but I also had no nooks or areas that were naturally created within my classroom.
In addition to photos, I also wanted to share an old video of a classroom tour from a few years ago. I feel like a video walk through is the best way to visualize a classroom floor plan because you can see the flow!
Like what you read? Don’t forget it, PIN IT!